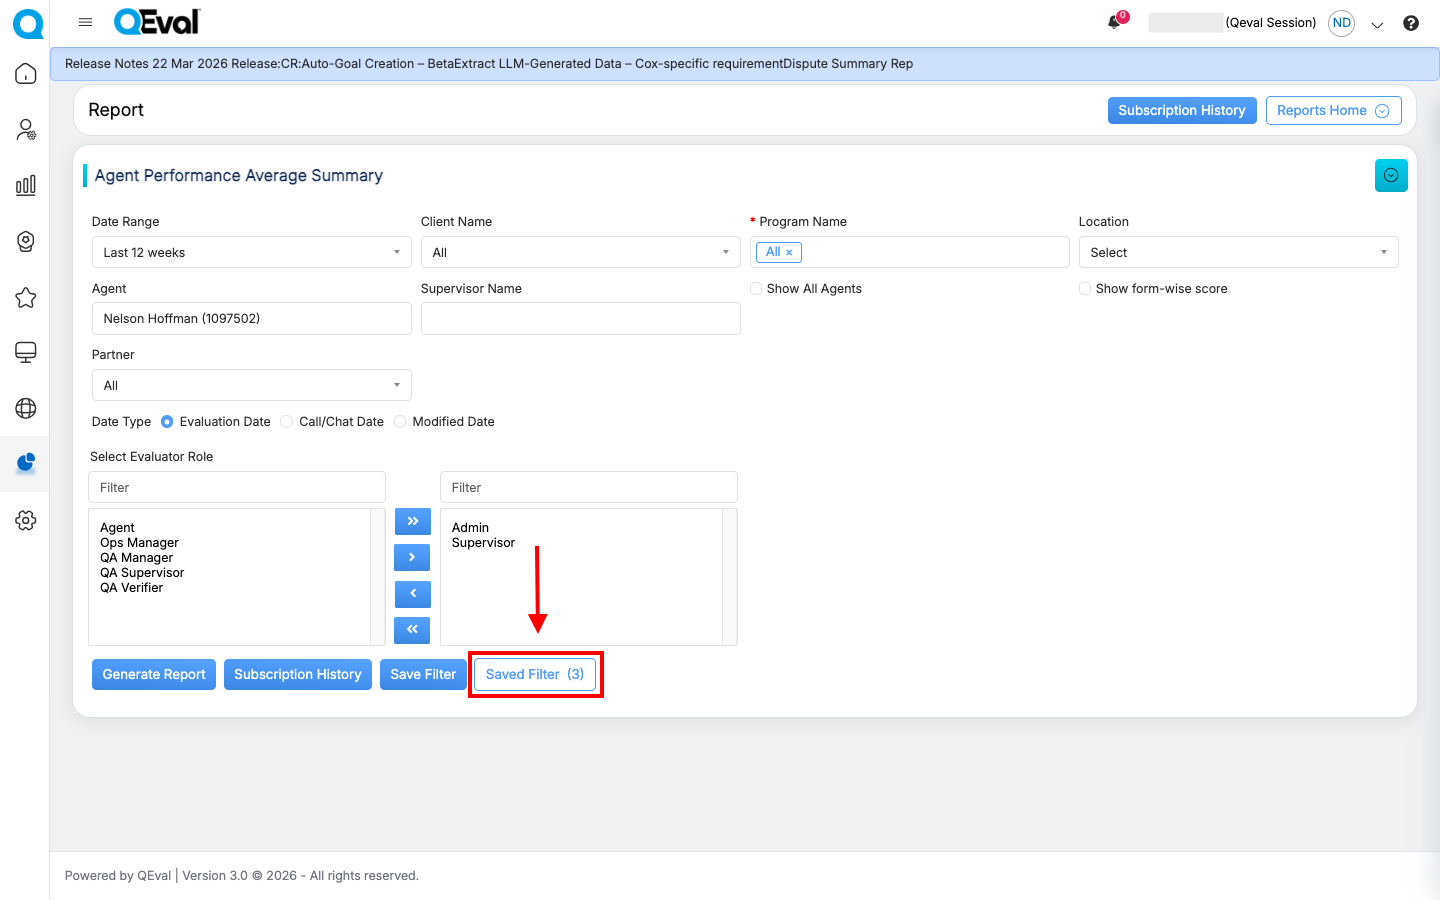
The Save Filter functionality allows users to store frequently used report filter combinations and quickly reuse them whenever needed. This helps reduce repetitive effort, improves efficiency, and ensures consistency while generating reports.
When generating a report, users can apply the required filter criteria and save that configuration for future use. Saved filters can later be accessed, applied, edited, deleted, or marked as the default filter.
This functionality is useful when the same report filters are used repeatedly across reporting workflows.
How to Save a Filter in Reports
To save a filter in any report:
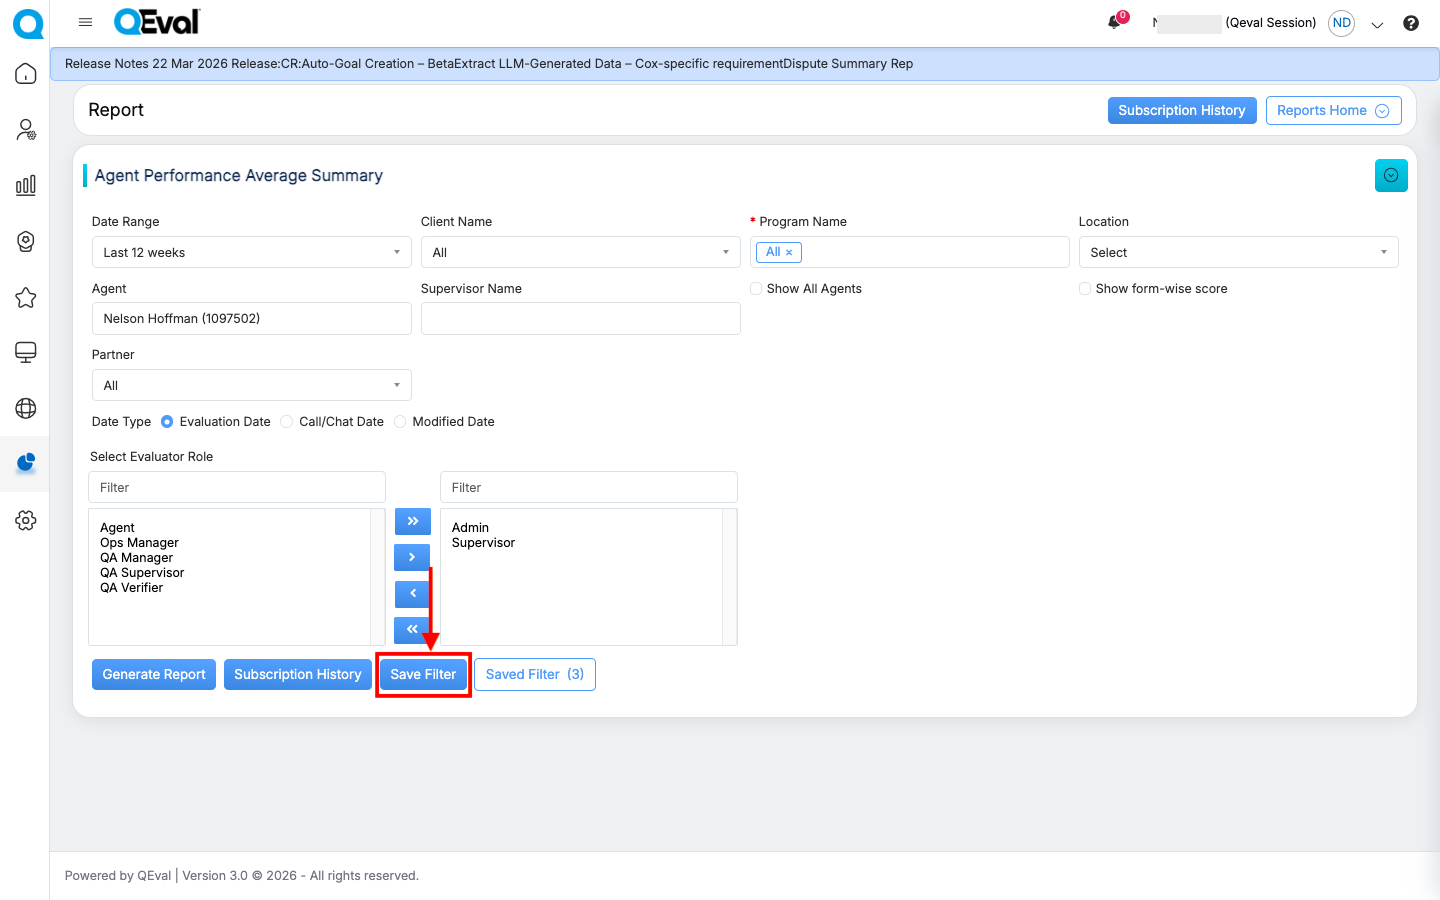
- Open the required report.
- Fill in the necessary filter fields.
- Click Save Filter.
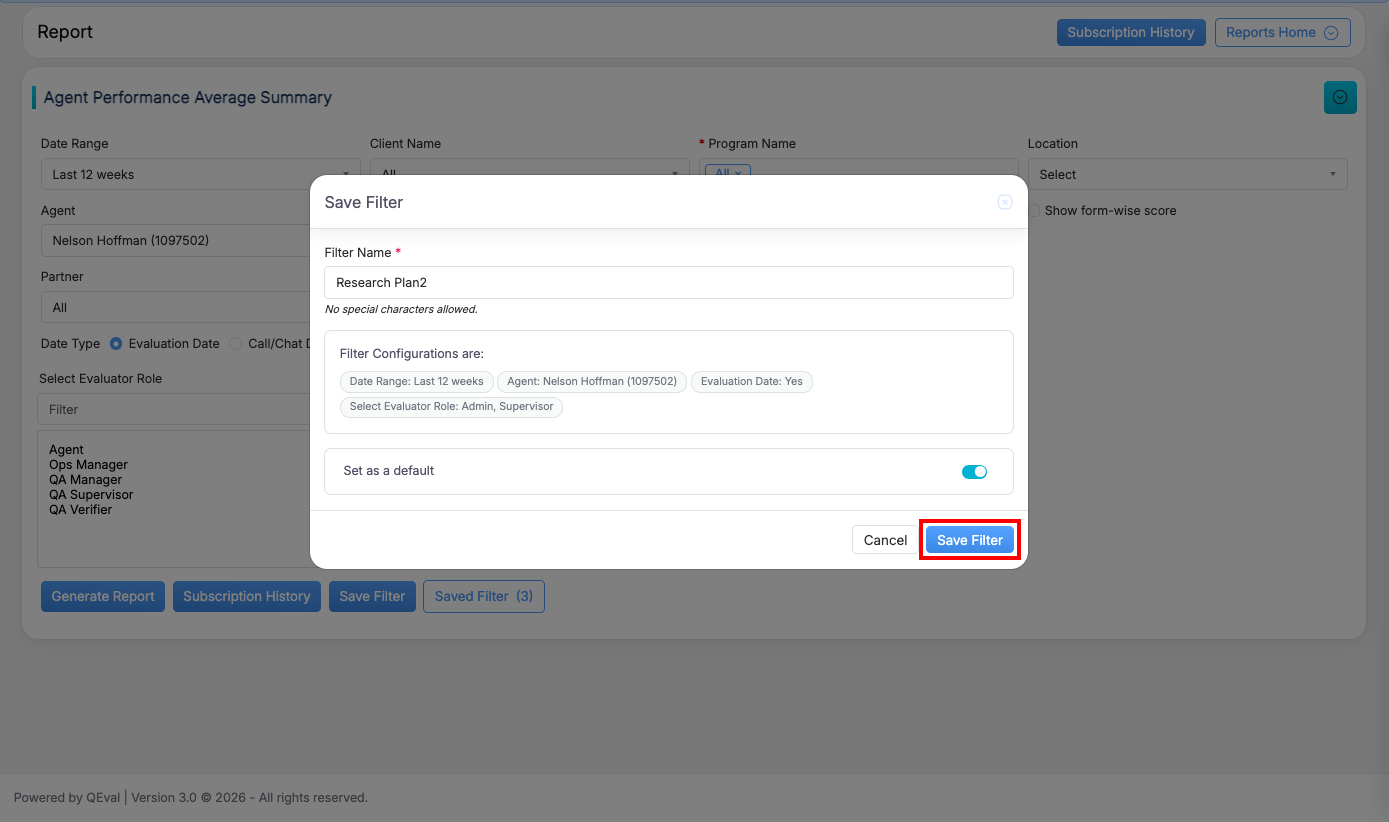
- In the pop-up window, enter a Filter Name.
- Review the filter configuration.
- Toggle On/Off if you want to set it as the Default Filter.
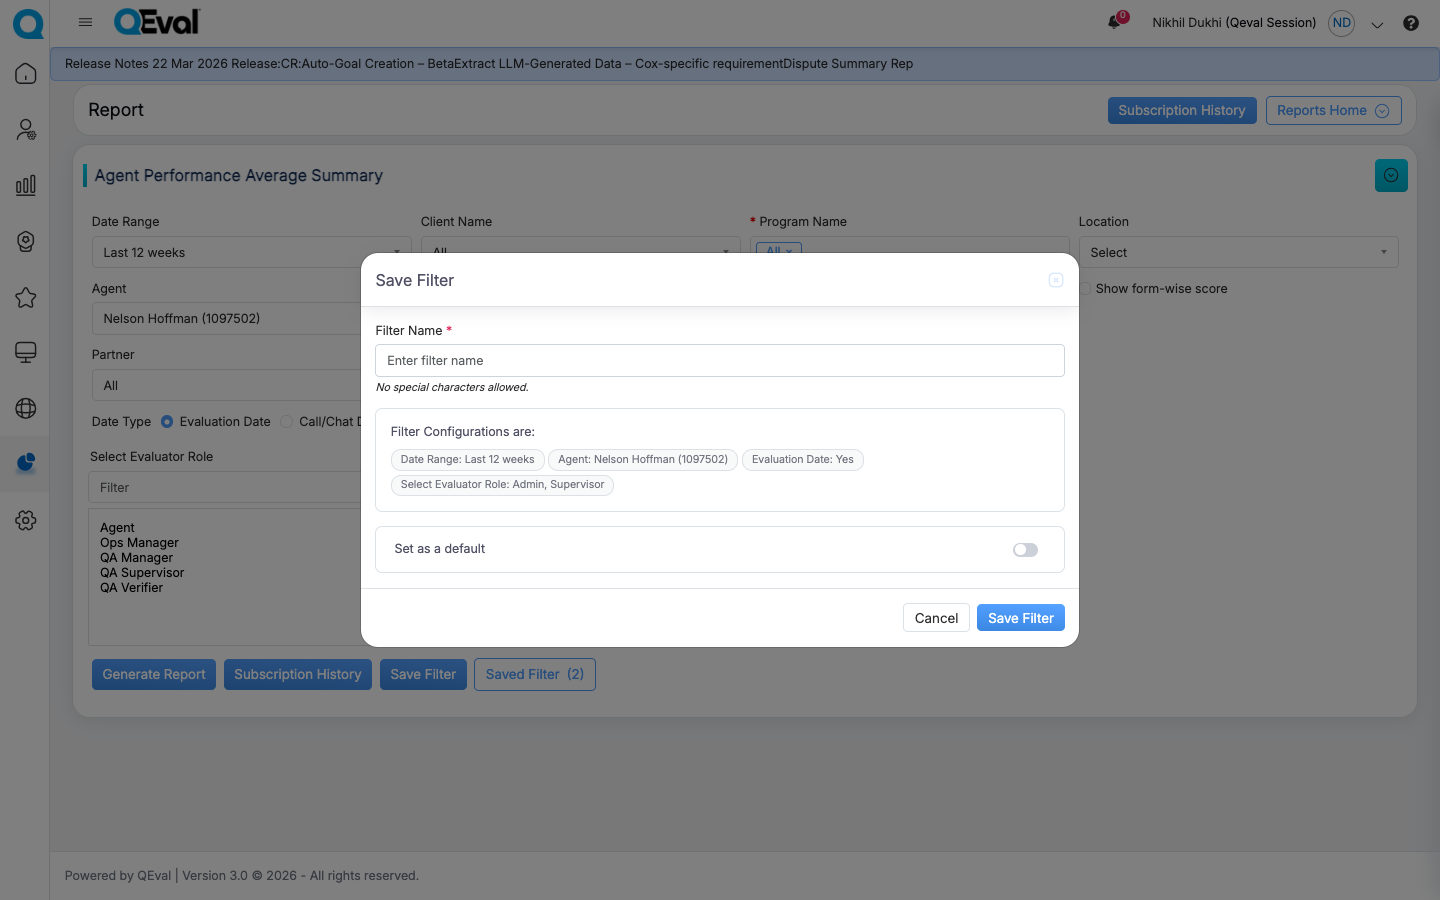
- Click Save Filter to store the configuration.
Once saved, the filter can be reused later without re-entering the same report criteria.
Important Notes
- A filter name can contain up to 50 characters
- Special characters are not allowed in the filter name
- Each user can save up to 10 filters per module
- If the maximum limit is reached, an existing filter must be deleted before saving a new one
Accessing Saved Filters
Saved filters can be accessed from the Saved Filter option at the top of the page. The number shown in parentheses reflects the current count of saved filters for that module, with a maximum limit of 10.
When the Saved Filters panel is opened, users can:
- View all previously saved filters
- See the applied filter criteria
- View the creation date or last modified date
- Click a saved filter to automatically apply the stored report conditions
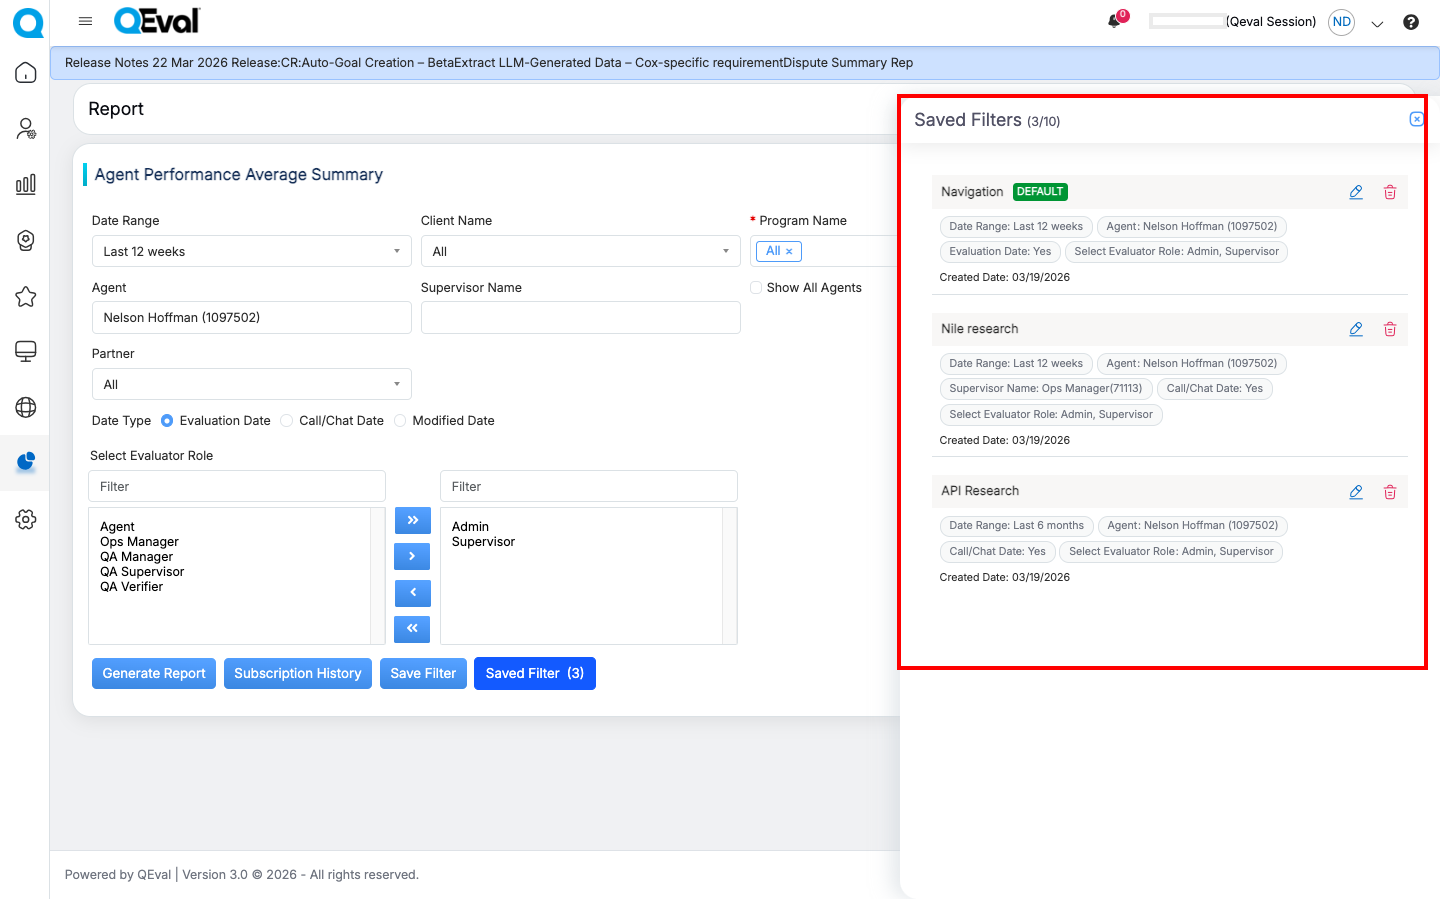
This allows users to quickly generate reports using previously defined filter combinations.
Managing Saved Filters
Users can manage saved filters directly from the Saved Filters panel.
Edit Filter
Users can click the Edit icon next to a saved filter to modify the filter name or update the filter criteria. Once Edit is selected, the report filter panel opens with the previously saved filter values already populated.
After making the required changes, click Save Filter to open the Update Filter pop-up, where you can revise the filter name, review the updated criteria, and optionally set it as the default filter.
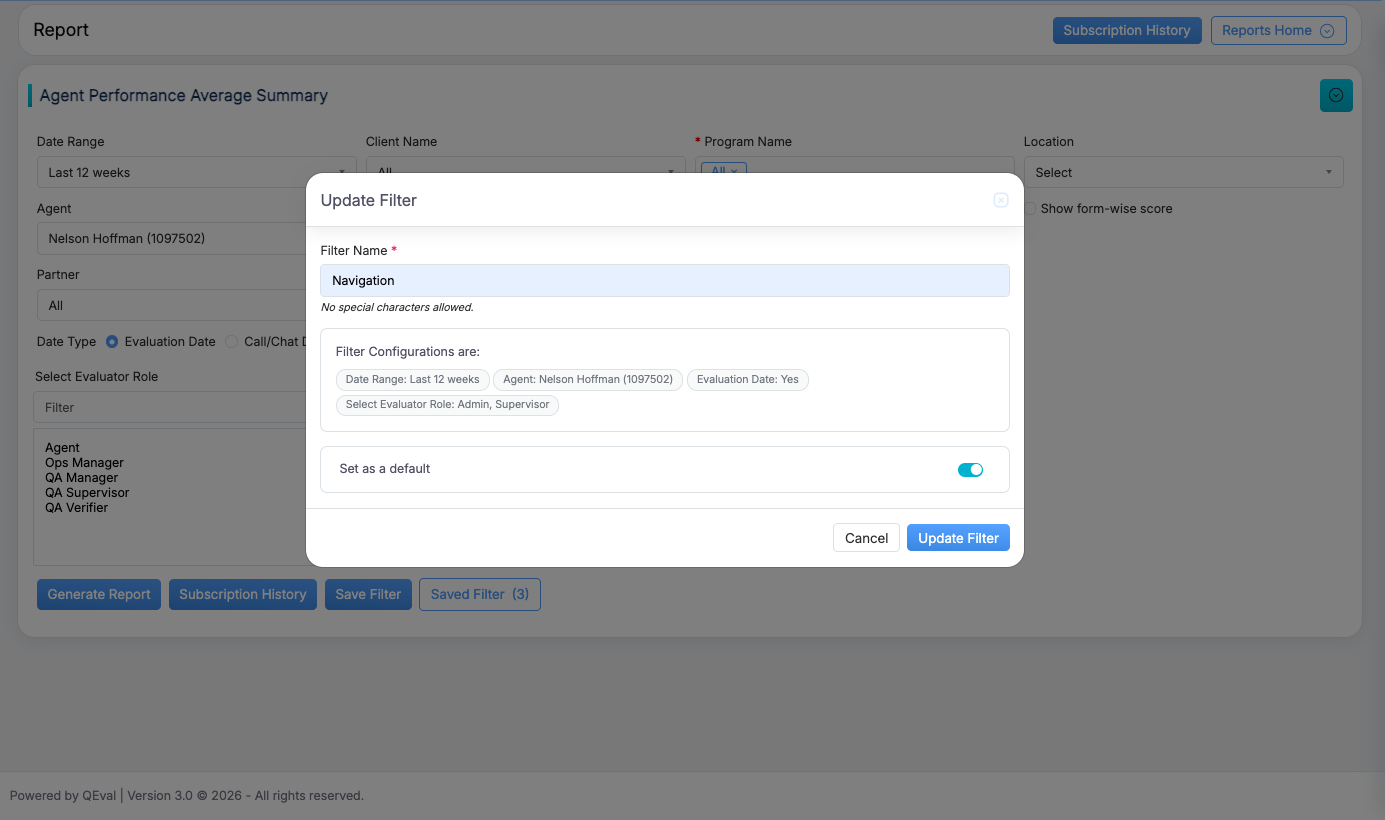
After making the required changes, click Update Filter to save them.
Delete Filter
Users can click the Delete icon next to a saved filter and confirm the action to permanently remove it.
Default Filter
One saved filter can be marked as the Default Filter. The default filter is automatically applied whenever the user opens that report section.
Access Validation
When a saved filter is applied, the system checks whether the user still has access to the associated Client, Program, or Evaluation Form included in the saved criteria.
If access has been removed, or if any selected entity no longer exists, the system displays an appropriate validation message, such as:
- Client access removed
- Program access removed
- Evaluation form access removed
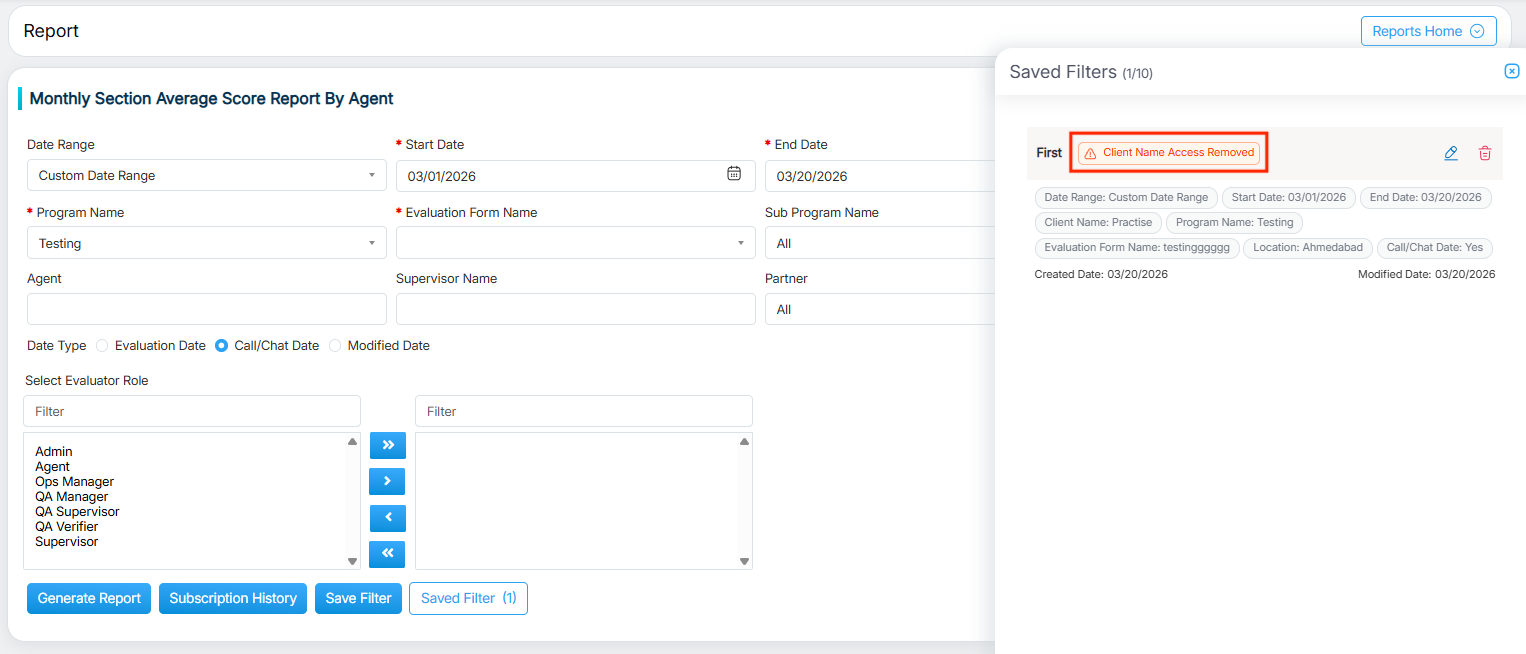
This ensures that saved filters are applied only to valid and accessible report data.
Summary
The Save Filter functionality in reports helps users save time by allowing them to store and reuse frequently used report filter combinations. It also supports better consistency, easier report generation, and simplified filter management across reporting modules.
Video