QEval allows the admin to create a customized evaluation form as per the requirements.
To create a new evaluation form, follow the steps given below:
- Click on the Create Evaluation Form button.
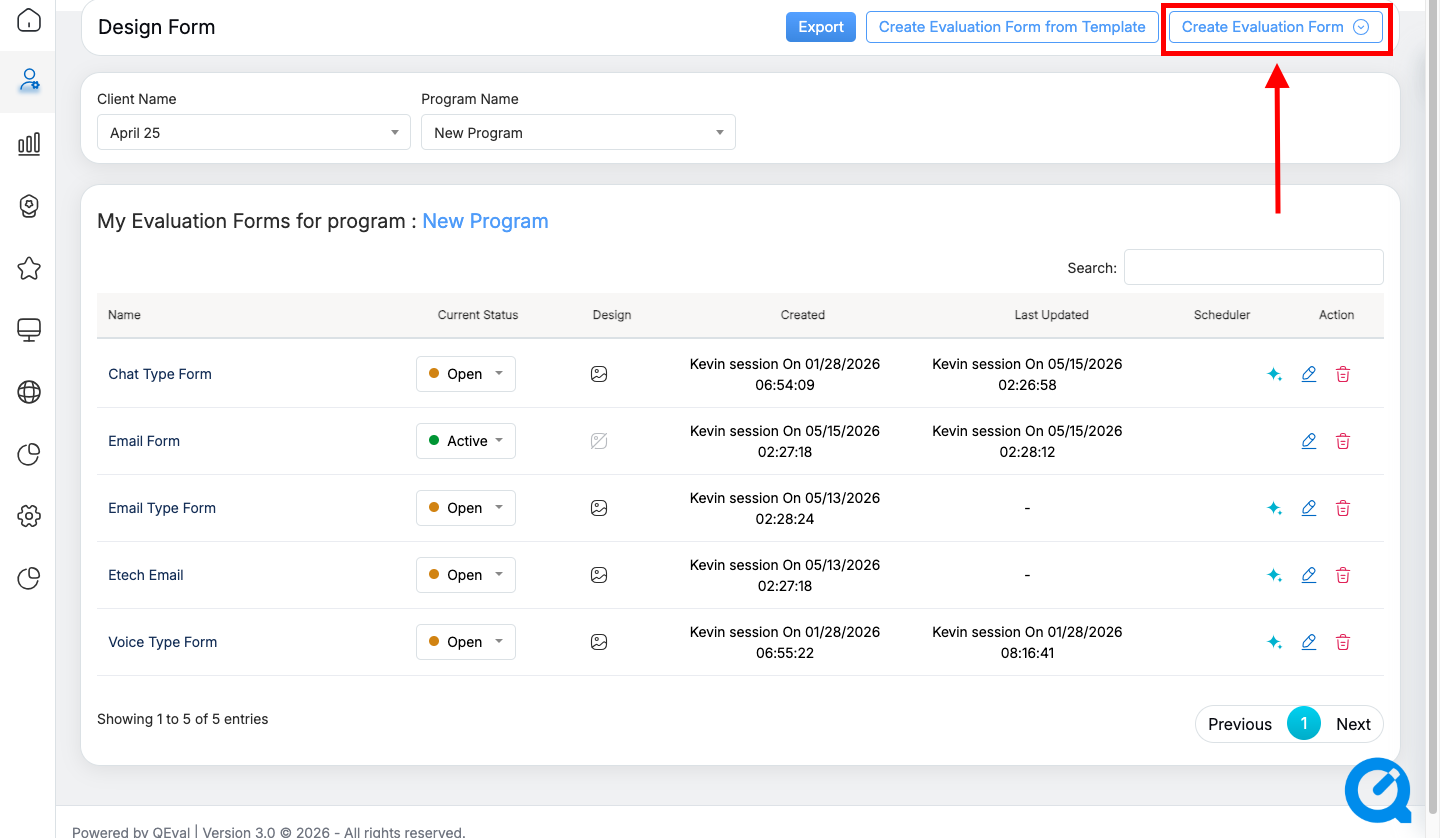
The following screen appears:
Create Evaluation Form
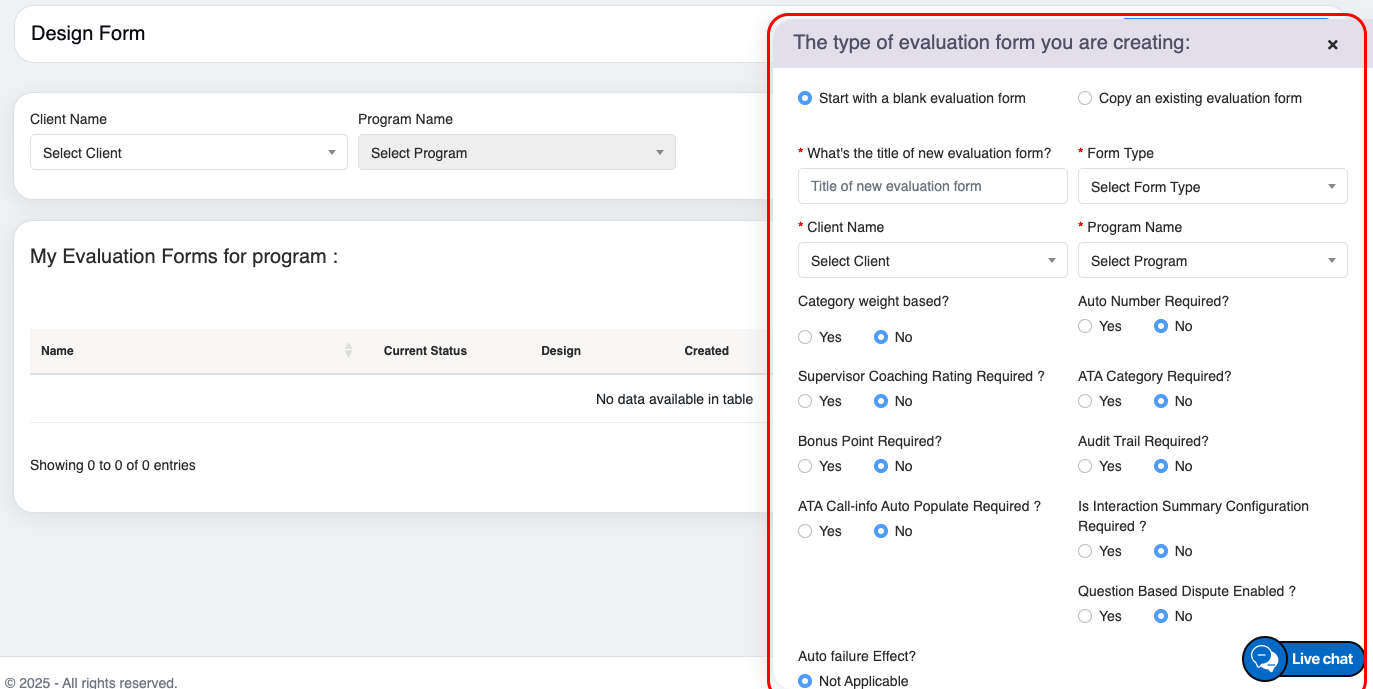
The page displays two options for creating an evaluation form:
- Start with a blank evaluation form
- Copy an existing evaluation form
Start with Blank Evaluation Form
Admin has the option to create an entirely new evaluation form. QEval recognizes this form type as a blank evaluation form. Admin can create a blank evaluation form for a client and its respective program. One also gets multiple options to enable as needed while creating the form.
To create a blank evaluation form, follow the steps given below:
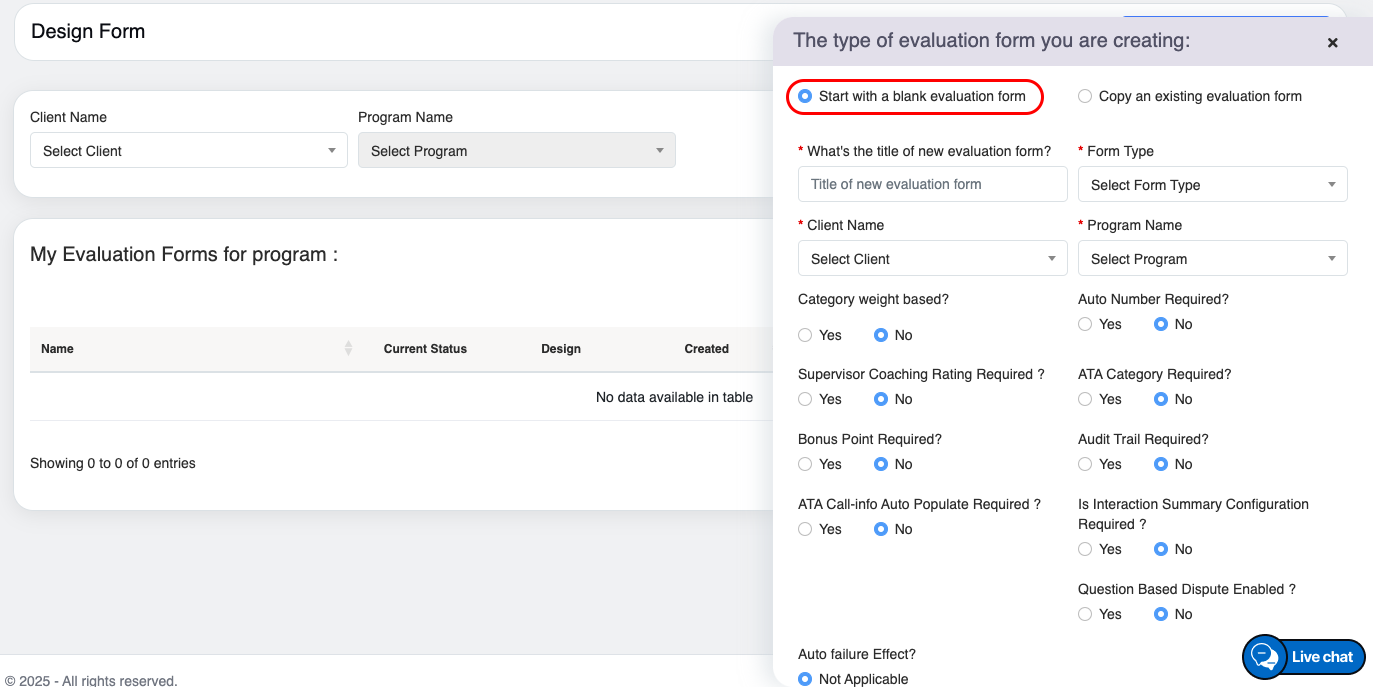
- Select the Start with a Blank Evaluation Form option and the following screen appears.
Create Evaluation Form
2. Provide the following details:
|
Screen Elements |
Description |
|
Title |
Enter the title of the form which will be displayed on the top of the form. |
|
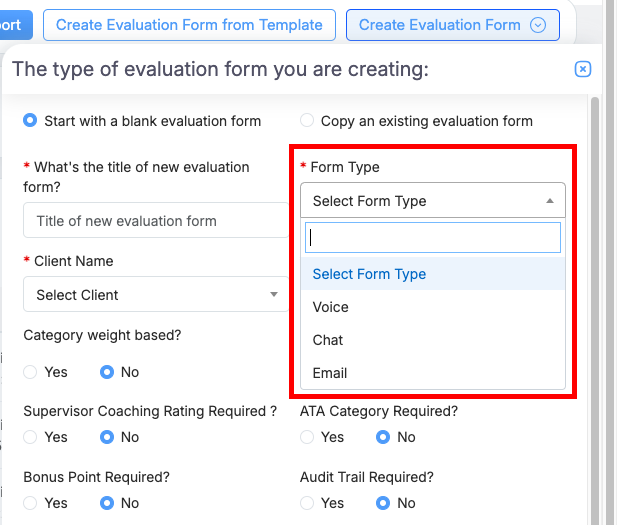
Form Type |
Select the type of form to be created from the following options:
|
|
Client Name |
Select the client name for which the form is to be created from the dropdown list. |
|
Program Name |
Select the program name for which the form is to be created from the dropdown list which will display the programs based on the selection of Client Name. |
|
Account Type |
Select the type of account from the dropdown list for which the form is to be created. |
|
Category weight based? |
Admin can create categories in the form based on weight using this option. Select Yes to create a weight-based category where one can rate each category in the form separately. Select No if a weight-based category is not needed. |
|
Auto Number Required? |
Select Yes to enable the auto-numbering feature in the form. Select No if the auto-numbering feature is not needed. |
|
Supervisor Coaching Rating Required? |
Select Yes to enable the coaching rating feature in the form for the supervisors. Select No if the coaching rating feature is not needed. |
|
ATA Category Required? |
Select Yes to enable the ATA category in the form. Select No if the ATA category is not needed. |
|
Bonus Point Required |
Select Yes to enable the Bonus Points feature in the form. Select No if the Bonus Points feature is not needed. |
|
Audit Trail Required? |
Select Yes to enable the Audit Trail feature in the form. Select No if the Audit Trail feature is not needed. |
|
ATA Call-info Auto Populate Required? |
Select Yes to auto-populate the call information for ATA in the form. Select No if this feature is not needed. |
|
Is interaction summary Configuration required |
Select Yes to enable the Interaction Summary configuration in the form. Select No if the Interaction Summary configuration is not required. |
Question Based Dispute Enabled ?
|
Select Yes to enable the question based dispute for evaluation form. Select No if this feature is not needed. Refer to the Agent View and Supervisor View under My Evaluation to learn how agents can raise disputes at the parameter level and how supervisors can review and submit dispute forms raised by agents, if the Question-Based Dispute feature is enabled during form creation. |
|
Auto Failure Effect? |
Auto failure means either the entire form has failed status or a particular category score is required to become zero if any mandatory quality parameter is missed by an agent. Select the effect of auto failure from the following options:
|
3. Once the new form configuration is done, click on the ![]() button to create the evaluation form or click
button to create the evaluation form or click ![]() button to to reset the above fields.
button to to reset the above fields.
On clicking Create Evaluation Form button the following acknowledgment message will be displayed as shown on the screen below.
![]()
The newly created form will be displayed in the grid on the Design Form page as shown on the screen below:
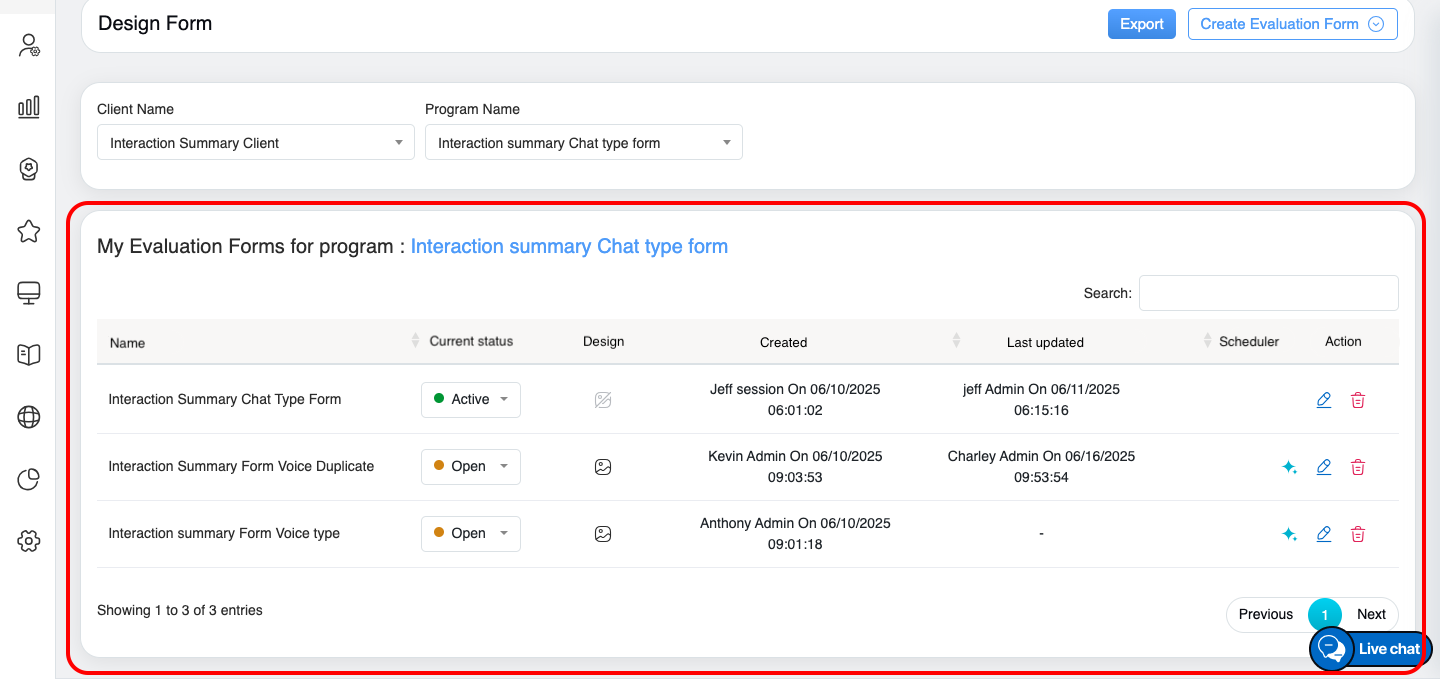
By default, the newly created form will be in the Open state. One can change it to Active by selecting the checkbox displayed in the Active column.
Notes:
- Only one form can be Active per program.
- To edit the form or view its design, one needs to first change its status to Open.
Copy an Existing Evaluation Form
When the admin selects to create an evaluation form using Copy an existing evaluation form, the system provides the option to copy parameters from an already existing form within QEval.
- Select Copy an existing evaluation form option and the following screen will be displayed.
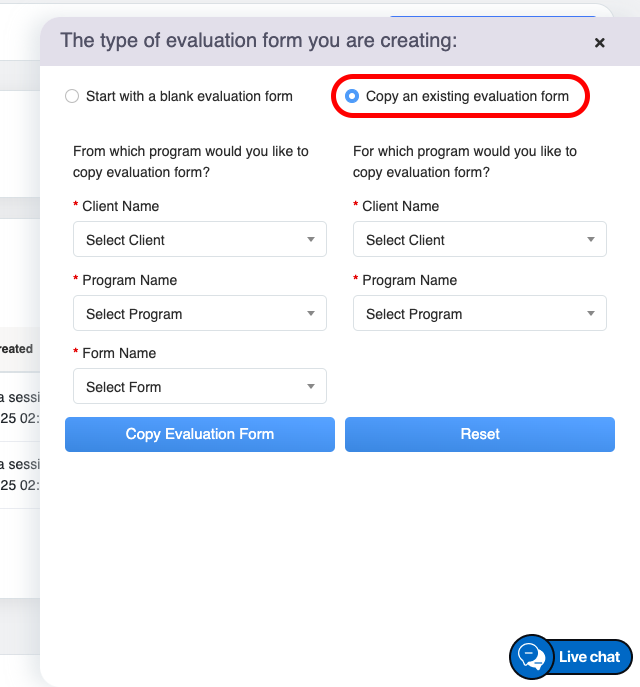
2. Provide the following details:
There are two sections on this page:
- From which program would you like to copy evaluation form?
- For which program would you like to copy evaluation form?
|
Screen Elements |
Description |
|
From which program would you like to copy evaluation form? |
|
|
Client Name |
Select the Client Name whose form is to be copied. |
|
Program Name |
Select the Program whose form is to be copied based on the selected client. |
|
Form Name |
Based on the selected client and program, select the form which is to be copied. |
|
For which program would you like to copy evaluation form? |
|
|
Client Name |
Select the client name under which the new copied form will be saved. |
|
Program Name |
Based on the selected client, select the program name under which the new copied form will be saved. |
3. Once the configuration of the copied form is done, click ![]() button to create the evaluation form or click
button to create the evaluation form or click ![]() button to reset the above fields.
button to reset the above fields.
On clicking Create Evaluation Form button, the following acknowledgment message will be displayed as shown on the screen below:

The newly created form will be displayed in the grid on the Design Form page as shown on the screen below:

By default, the newly created form will be in the Open state. One can change it to Active by selecting the checkbox displayed in the Active column.
Notes:
- Only one form can be Active per program.
- To edit the form or view its design, one needs to first change its status to Open.
Once the form gets copied the design of the form will appear as shown on the screen below.
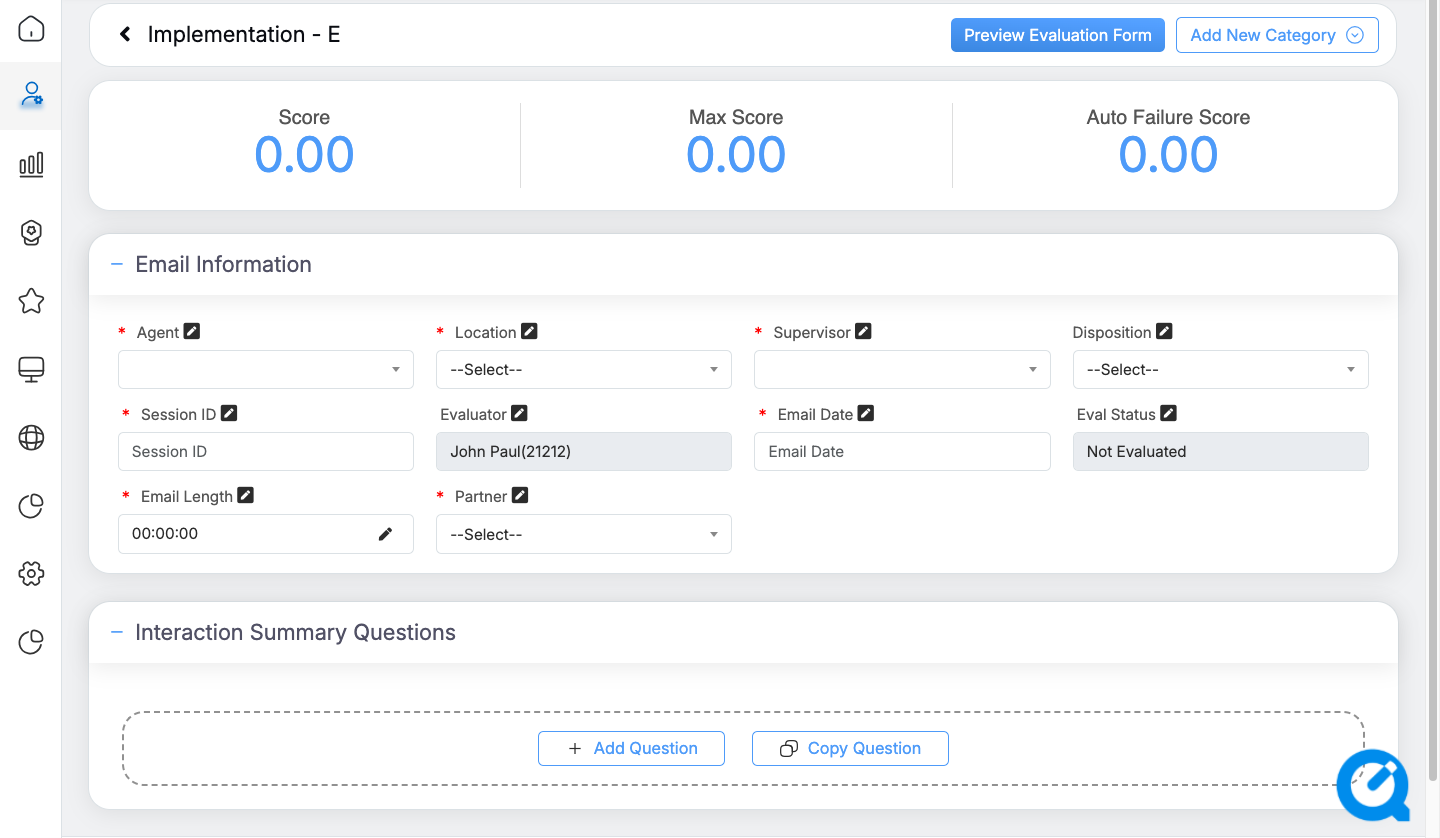
Form type: Email
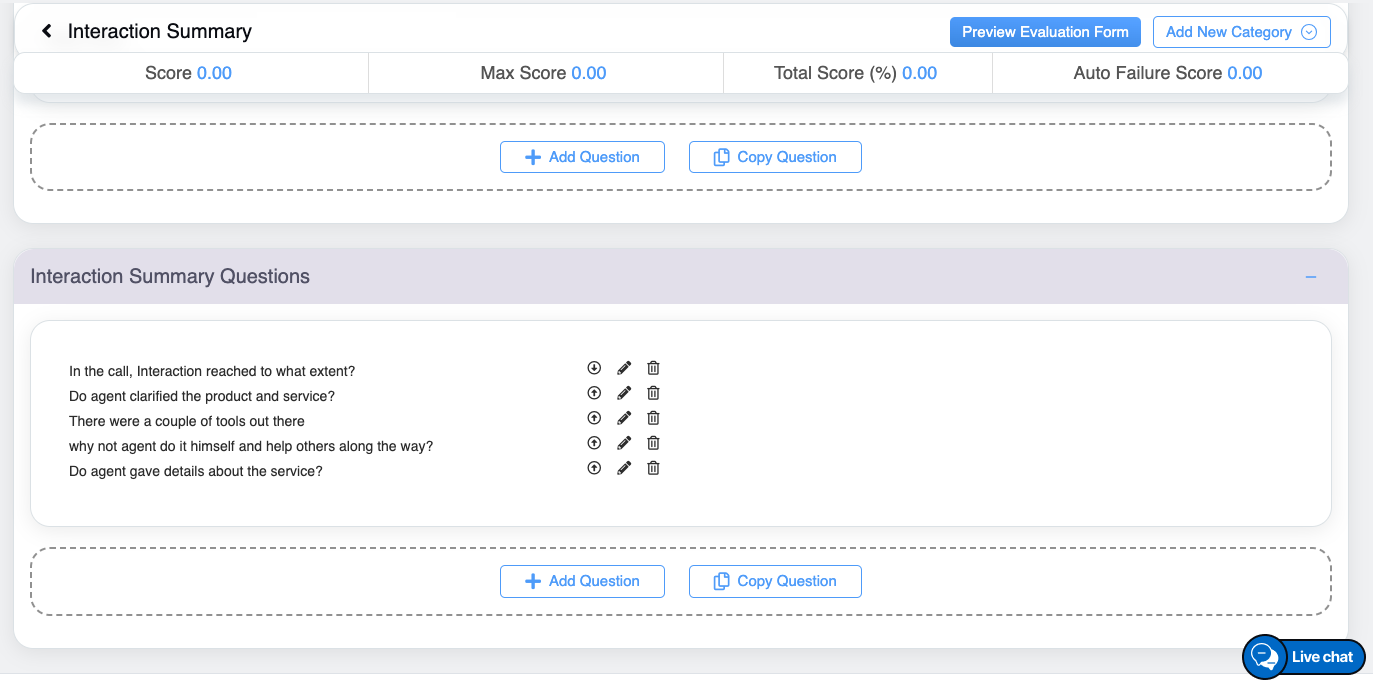
If the interaction summary option is selected while creating the evaluation form, a dedicated tab will appear where users can add up to five questions. These questions will be displayed on the call evaluation page, and AI will generate responses based on the call. Users can edit, reorder, or update the questions at any time by modifying the form.
Note: The only difference between the Chat type form and the Voice type form is that a media player control is attached to the Voice type form so that the evaluator can listen to the call from the form itself and evaluate. Rest all the fields are the same.
Edit Form
Once the evaluation form is created, one can edit or update its information from the Design Form page.
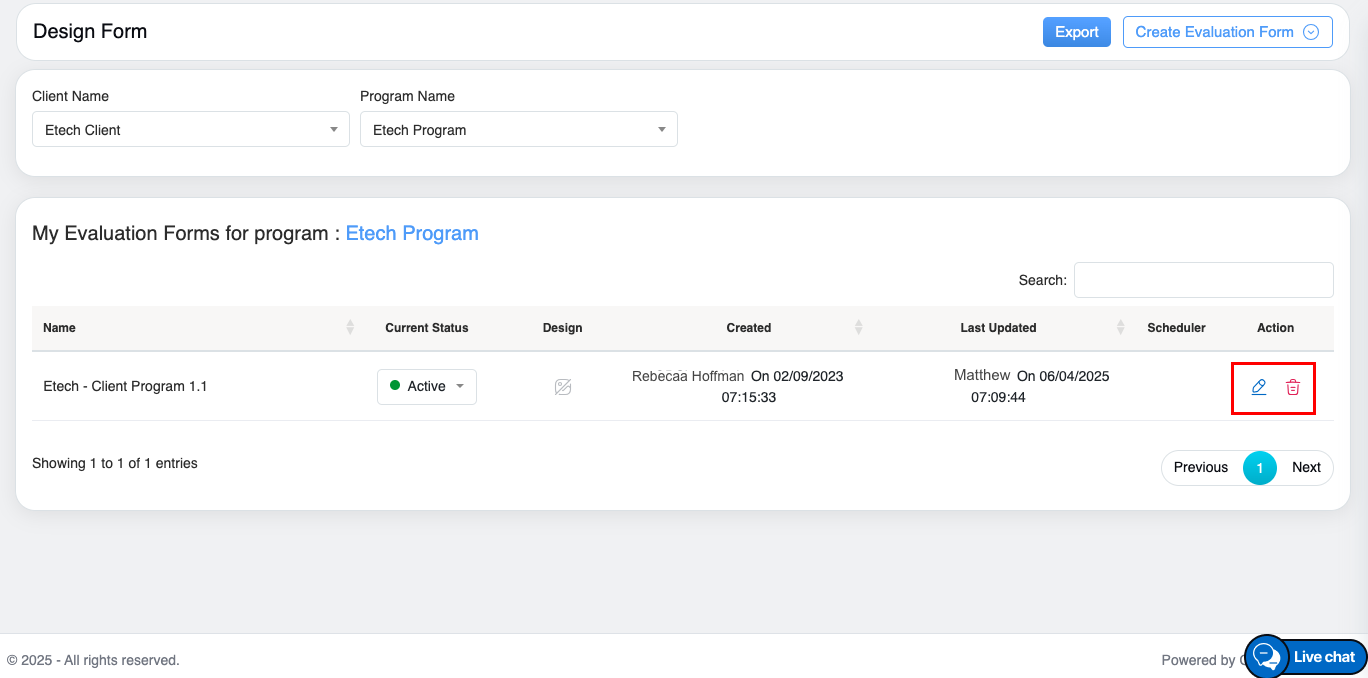
Click on the Edit ![]() icon displayed under the Action column to edit a particular evaluation form and the Edit Form window will be displayed as shown below:
icon displayed under the Action column to edit a particular evaluation form and the Edit Form window will be displayed as shown below:
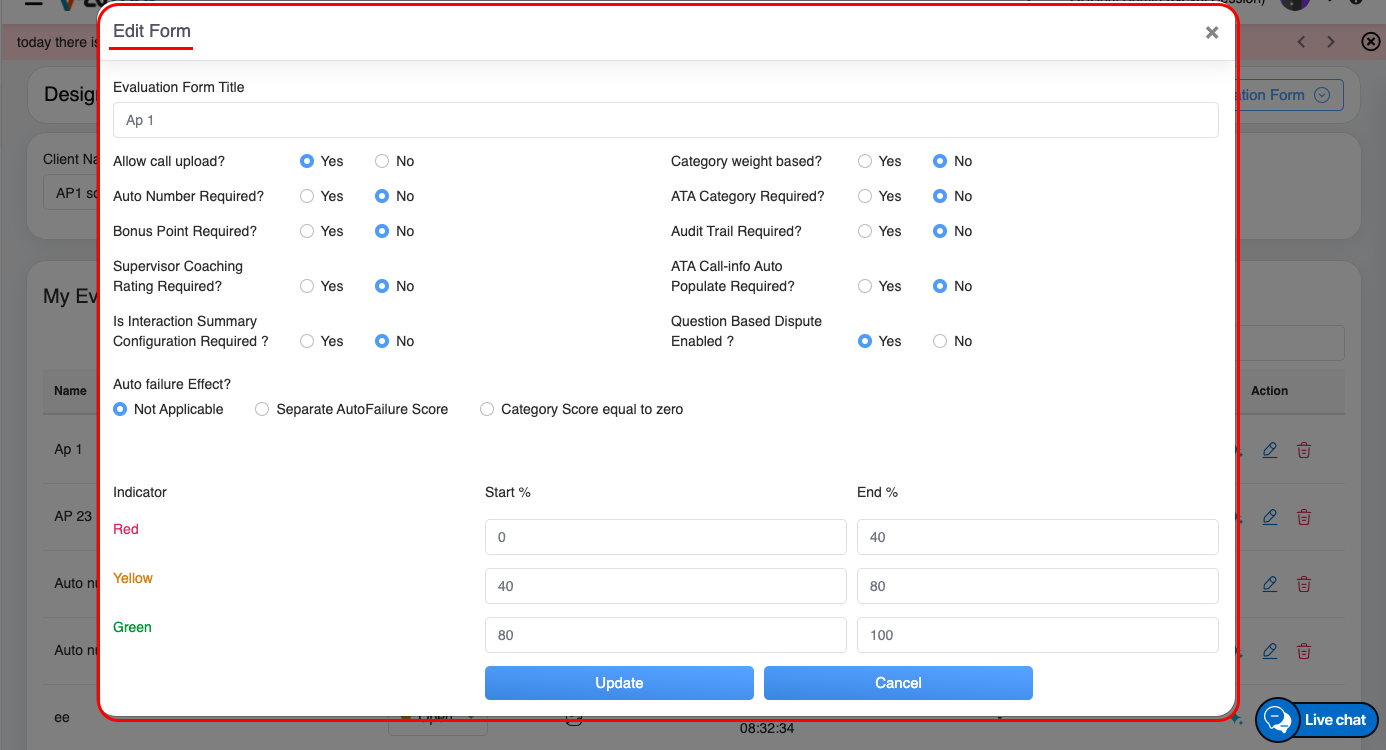
Edit Form
The following fields displayed on this page can be edited:
|
Screen Elements |
Description |
|
Evaluation Form Title |
One can edit the title of the evaluation form created to some other name. |
|
Allow Call Upload? |
Select Yes to upload the call record to the form. Select No to restrict the uploading of calls. Note: Will be displayed only if the form is of Voice Type. |
|
Category weight based? |
Allows editing the category settings. |
|
Auto Number Required? |
Allows editing the auto-numbering feature in the form. |
|
ATA Category Required? |
Allows editing the ATA category in the form. |
|
Bonus Point Required |
Allows editing the Bonus Points feature in the form. |
|
Audit Trail Required? |
Allows editing the Audit Trail feature in the form. |
|
Supervisor Coaching Rating Required? |
Allows editing the coaching rating feature in the form for the supervisors. |
|
ATA Call-info Auto Populate Required? |
Allows editing to auto-populate the call information for ATA in the form. |
|
Is interaction summary configuation required ? |
Enables editing of the inclusion (Yes or No) of the Interaction Summary configuration feature in the form. |
|
Single Score |
Allows the single score instead of multiple individual criteria for form evaluation when the Single Score checkbox is selected. |
|
Question Based Dispute Enabled |
Allows editing to enable the question based dispute for evaluation form. |
|
Auto Failure Effect? |
One can edit the effect of auto failure in form as per requirement. |
|
Indicator |
One can edit the values of the Start % and End % fields of the indicator as per requirement. |
Once the changes are done, click ![]() or click
or click ![]() to cancel the process.
to cancel the process.
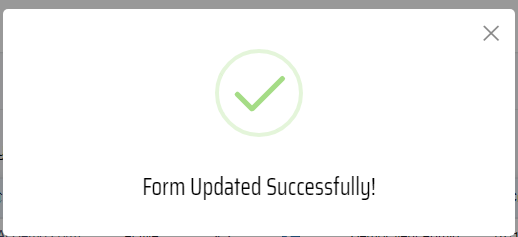
Once the form is updated, the following acknowledgment message will be displayed.
Once the evaluation form is created, one can initiate the design of the form. To know more about form designing, refer to Design Form.
Video