Canned Responses are predefined responses used by Quality Analysts while replying back to the agents. They are organization independent. This page allows the managers to add, search, edit and delete canned responses.
To access this functionality, select Manage > Program Configuration > Canned Response as shown below:
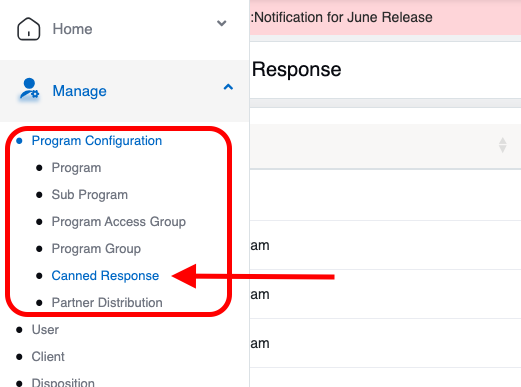
Menu Tab
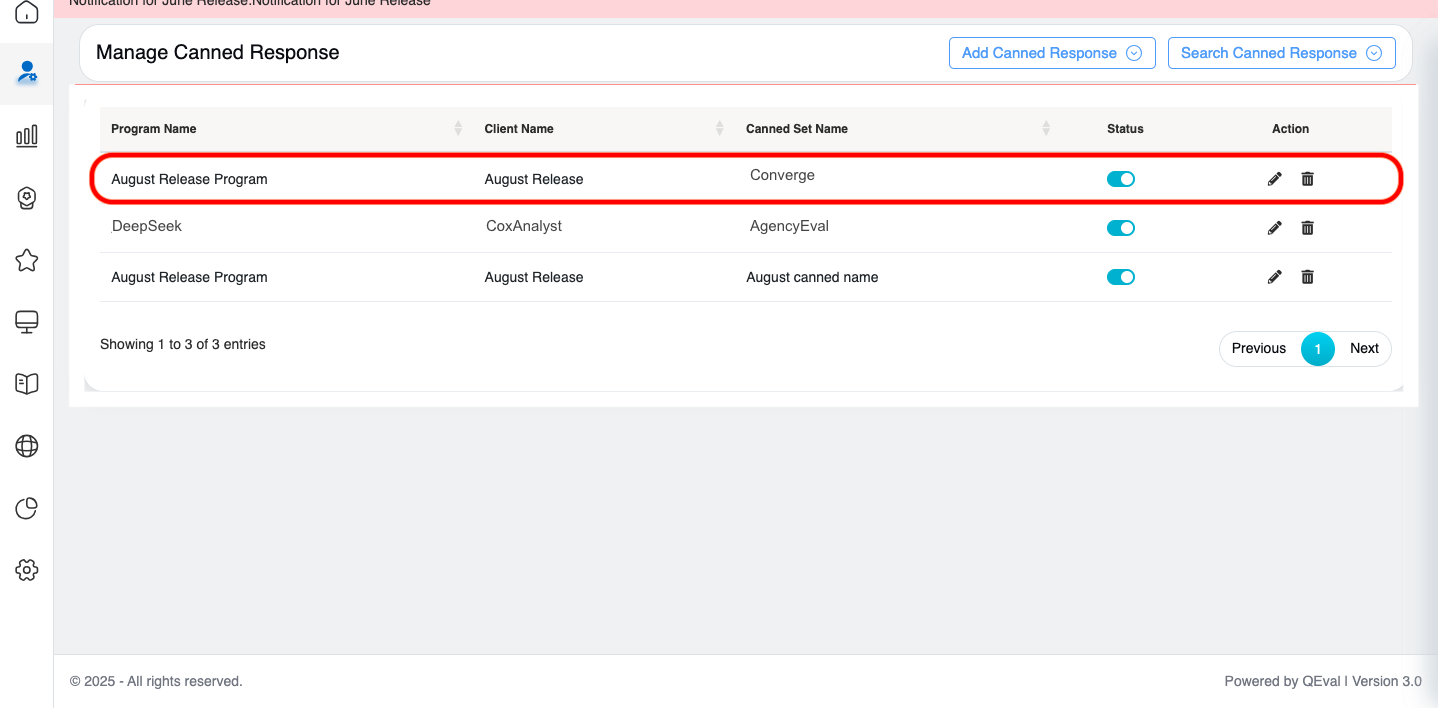
Manage Canned Response page will be displayed as shown below:

Manage Canned Response Tab
This page displays the list of all the canned responses that are already created for different clients.
Add Canned Response
Add canned response functionality allows an admin to add a new canned response.
To add the canned response follow the steps given below:
- Click on the Add Canned Response button.

Add Canned Response Tab
The following screen will be displayed.
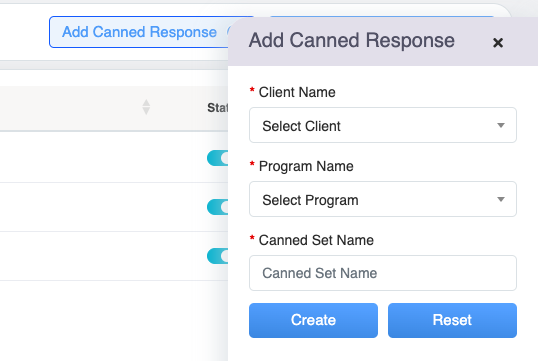
Add Canned Response Tab
2. Select Client Name and Program Name from the respective dropdown list.
3. Enter the name of the canned responses set in the Canned Set Name field.
4. Click ![]() button to create the canned response set or click
button to create the canned response set or click ![]() button to reset the fields.
button to reset the fields.
The newly added canned responses set will be displayed on the Manage Canned Response page as shown on the screen below:
Manage Canned Response Tab
The following acknowledgment message will be displayed:

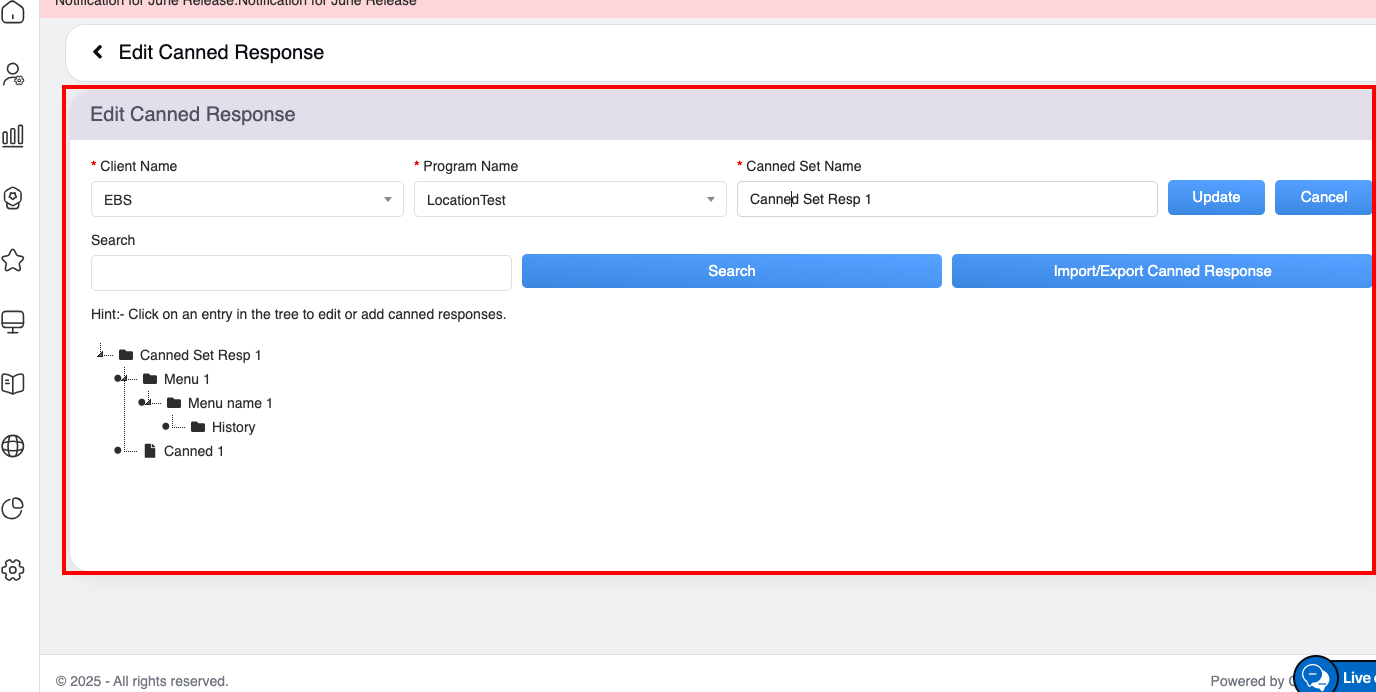
Once created, the admin will be directed to the Edit Canned Response page as shown below.
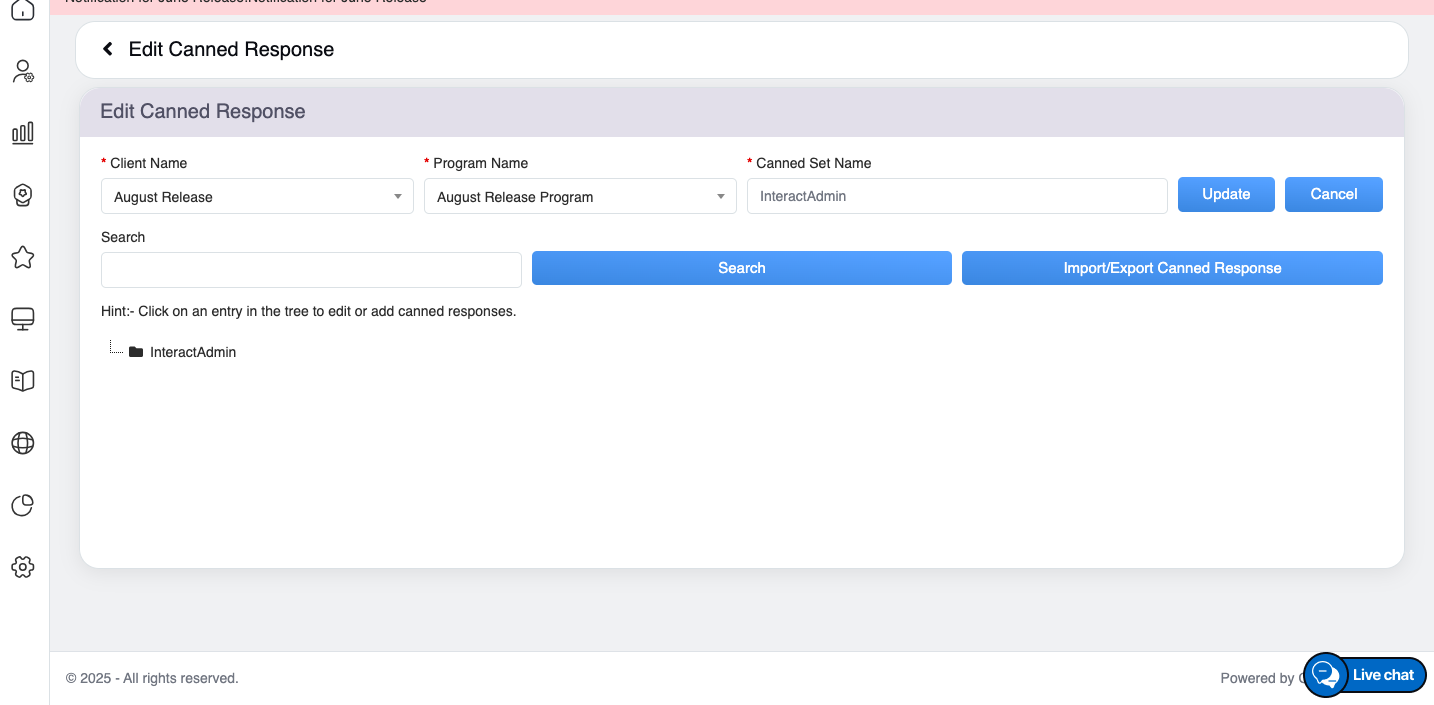
Edit Canned Response Tab
From this page, the admin can add one or more canned responses to the created canned response set.
To add the canned responses follow the steps given below:
- The Client Name and the Program Name will display their respective names, which were configured from the Add Canned Response page. To change any of this information, select them from the respective dropdown list.
- The Canned Set Name will display the name of the set which was configured from the Add Canned Response page.
- If the values of any of the above-mentioned fields are updated, then click on the
 button.
 - Enter the Set Name in the search box to search for a particular canned letter, then click on the
 button .
The Canned Responses Set which is also known as Root Node, will be displayed as shown below:
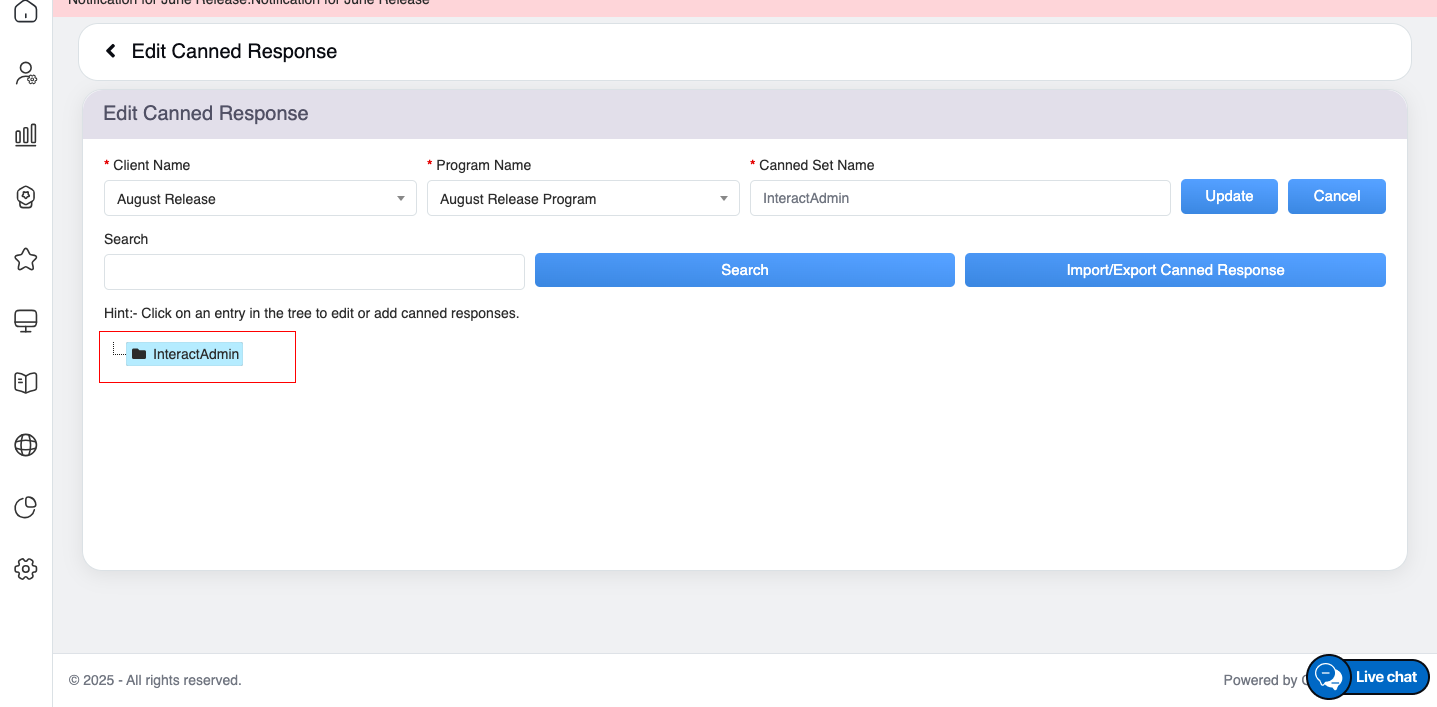
Edit Canned Response Tab
5. Click on the Canned Response Set folder.
Root Node window will be displayed as shown below:
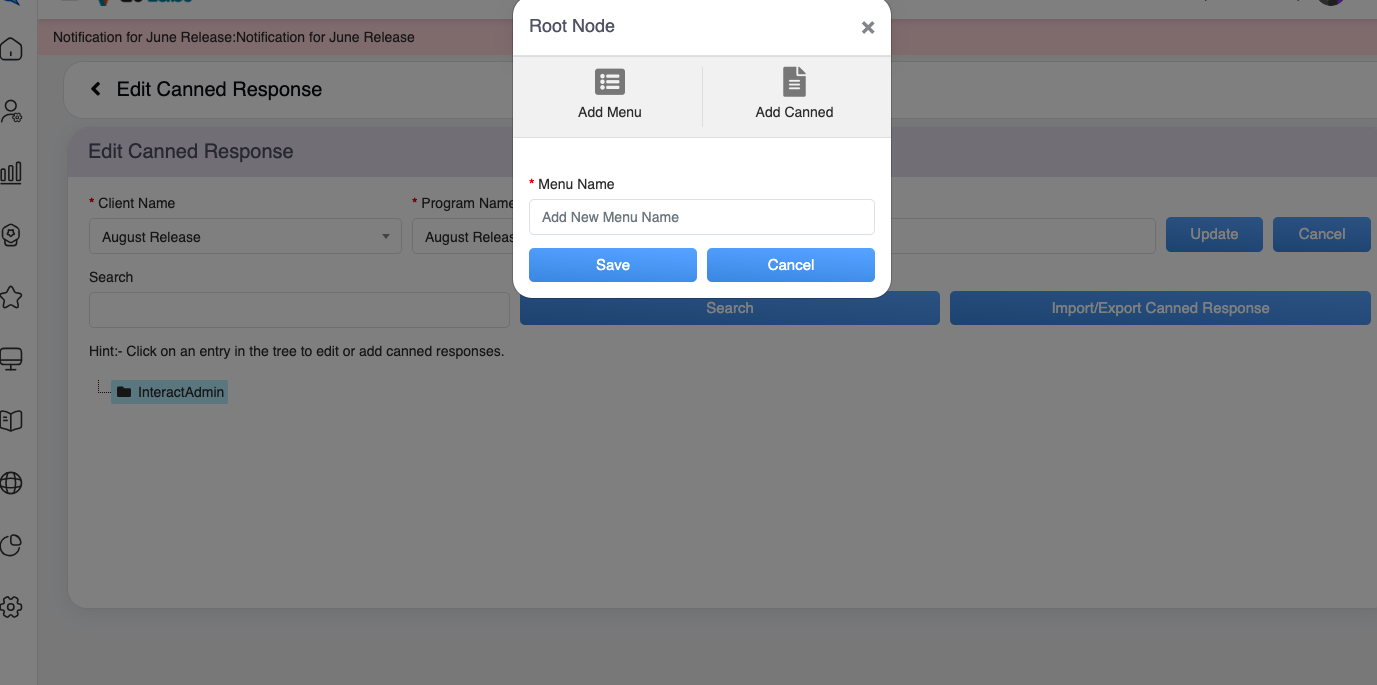
Root Note Tab
6. Click on the Add Menu tab to create a new sub-menu under the main Root Node, and enter a new menu name.
7. Click on ![]() button to add or click
button to add or click ![]() to cancel the process. The new menu will be added to the existing Canned Response set.
to cancel the process. The new menu will be added to the existing Canned Response set.
Such types of sub-menus are known as Parent Nodes.
The following screen displays the two Parent Nodes of one Root Node.
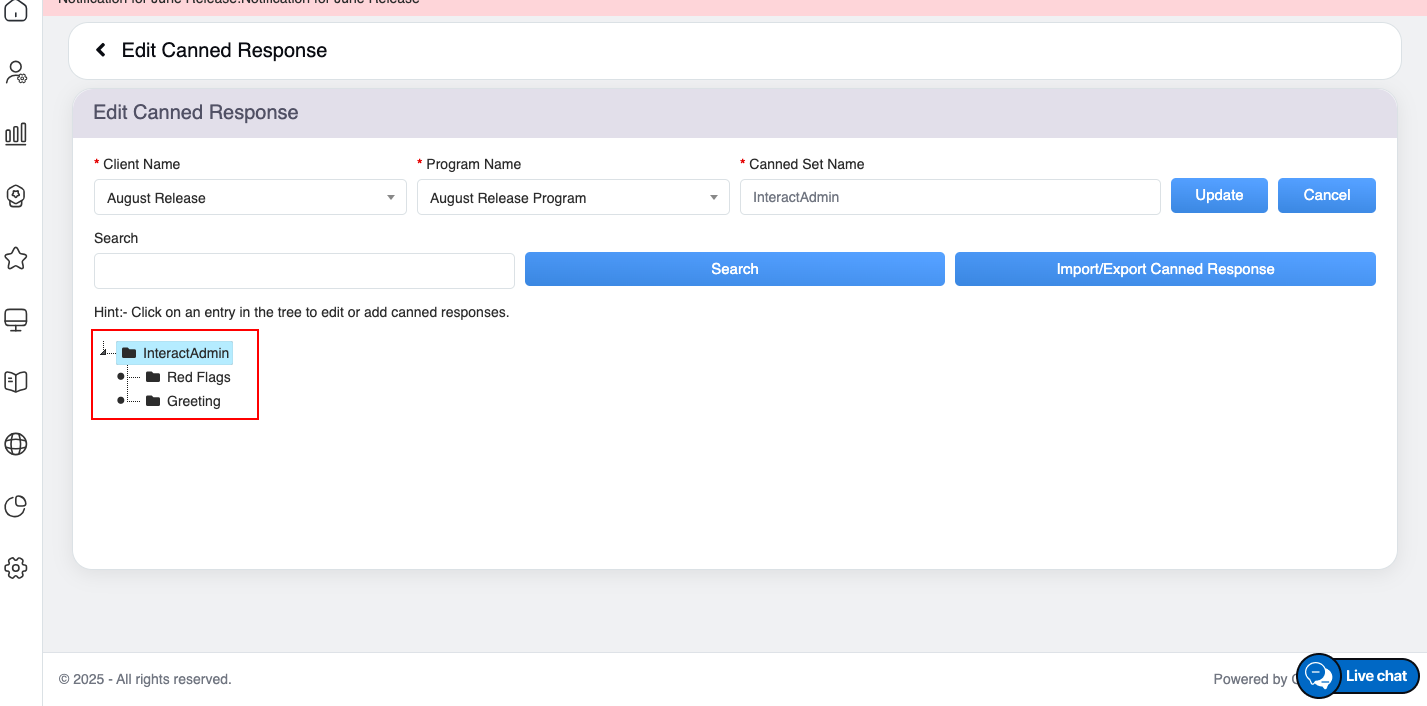
Edit Canned Response Tab
8. To add a new canned response directly for the Root Node, click on Add Canned tab and enter a new name of the canned response.
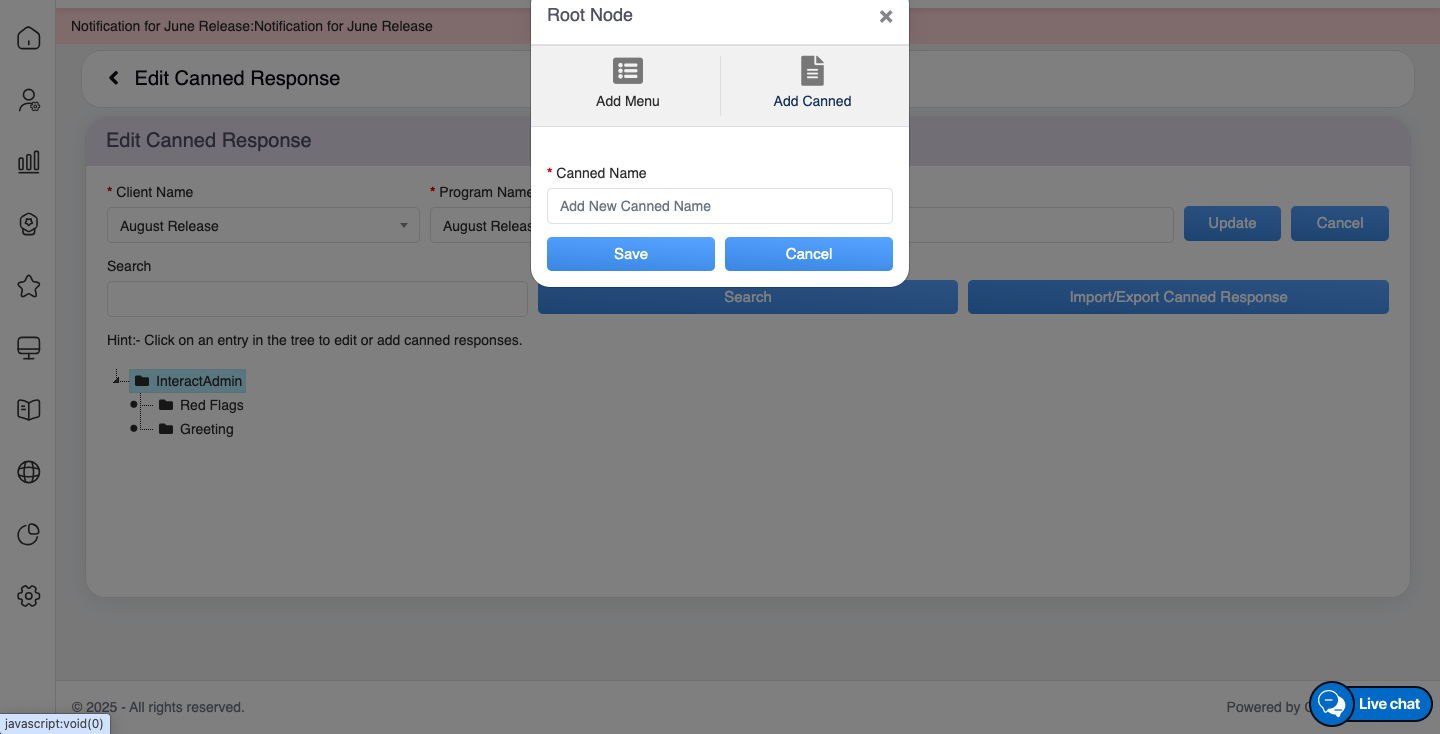
Root Note Tab
9. Click on ![]() button to add or click
button to add or click ![]() to cancel the process. The new canned response will be added to the existing Canned Response set i.e. Root Node.
to cancel the process. The new canned response will be added to the existing Canned Response set i.e. Root Node.
10. To add a new sub-menu directly under the Parent Node, click on the Parent Node name, and the Parent Node window will be displayed as shown below:
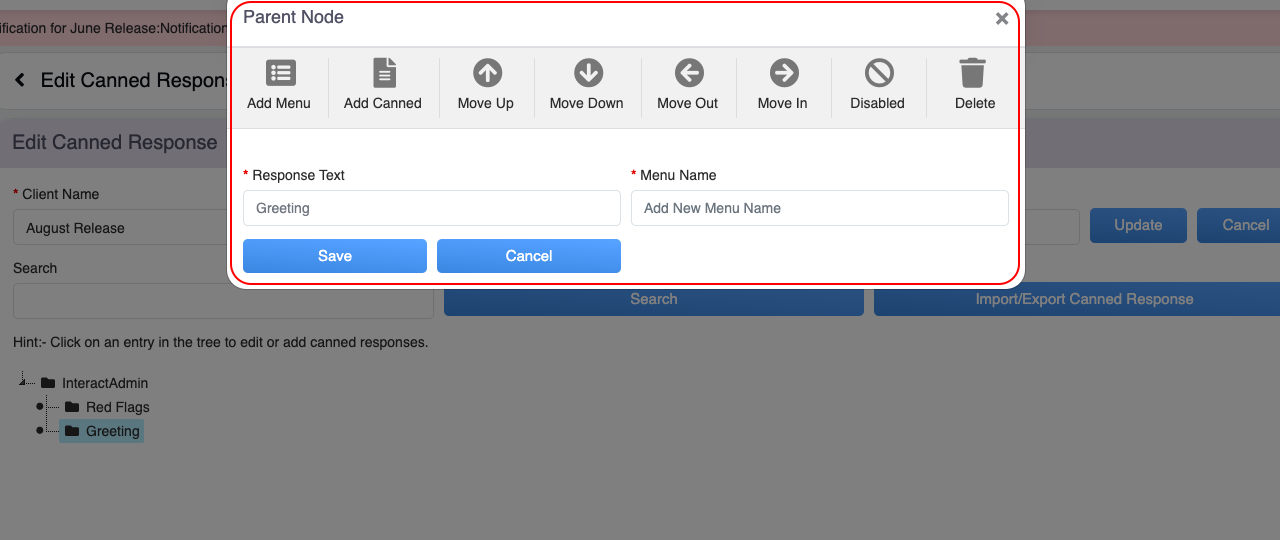
Parent Node Tab
11. Enter the Response Text and the Menu Name in their respective fields.
The following features will be displayed on the Parent Node window:
-
- Add Menu: To add a new sub-menu.
- Add Canned: To add a new canned response.
- Move Up: To move the position of the Parent Node one step upward.
- Move Down: To move the position of the Parent Node one step downward.
- Move Out: To move the position of the Parent Node outside of one main Parent Node, making it the main menu.
- Move In: To move the position of the Parent Node inside of one main Parent Node, making it the sub-menu.
- Disabled: To disable the Parent Node.
- Delete: To delete the Parent Node.
12. Once all the details are configured, click ![]() button to save the edited Parent Node or click
button to save the edited Parent Node or click ![]() to cancel the process.
to cancel the process.
The Parent Node window allows adding/editing the sub-menus or parent nodes.
The Canned Response Tree will be displayed as shown below:

To expand and collapse any of the Canned Response menus, click on the highlighted element on the following screen:

Once expanded, the Canned Response menus and sub-menus will be displayed as displayed on the following screen:

13. To add or edit a canned response directly under the Parent Node, click on the Canned Response.
 The Canned Response window will be displayed as shown below:

The following features will be displayed on the Canned Response window:
-
- Move Up: To move the position of the Canned Response one step upward.
- Move Down: To move the position of the Canned Response one step downward.
- Move Out: To move the position of the Canned Response outside of one main Parent Node, making it the main menu.
- Move In: To move the position of the Canned Response inside of one main Parent Node, making it the sub-menu.
- Disabled: To disable the Canned Response.
- Delete: To delete the Canned Response.
14. Configure the following fields displayed in this window:
|
Screen Elements |
Description |
|
Name |
Displays the name of the canned phrase. |
|
Response Text |
Enter the Response Text which is to be displayed in the Canned Responses. |
|
Hot Key |
Enter a single character key for the hot key which is to be configured for the canned phrase. |
|
Modifiers |
Select the checkbox(es)modifiers to be included with the key to make a hot key for the canned phrase. The modifiers are:
|
15. Once all the details are configured, click ![]() button to save the edited Canned Response or click
button to save the edited Canned Response or click ![]() to cancel the process.
to cancel the process.
The Canned Phrase window allows adding/editing the Response Text.
The newly added canned response set becomes visible on the Manage Canned Response.
Import/Export Canned Response
This functionality helps the admin to create canned responses by downloading the pre-designed template from the QEval system. Once created, the admin can upload the canned responses using the import function. Similarly, an admin has the option to export the canned response sets.
From the Edit Canned Response page, the admin can import/export the set of canned responses. To do so, follow the steps mentioned below.
- Click on the Import/Export Canned Response button.
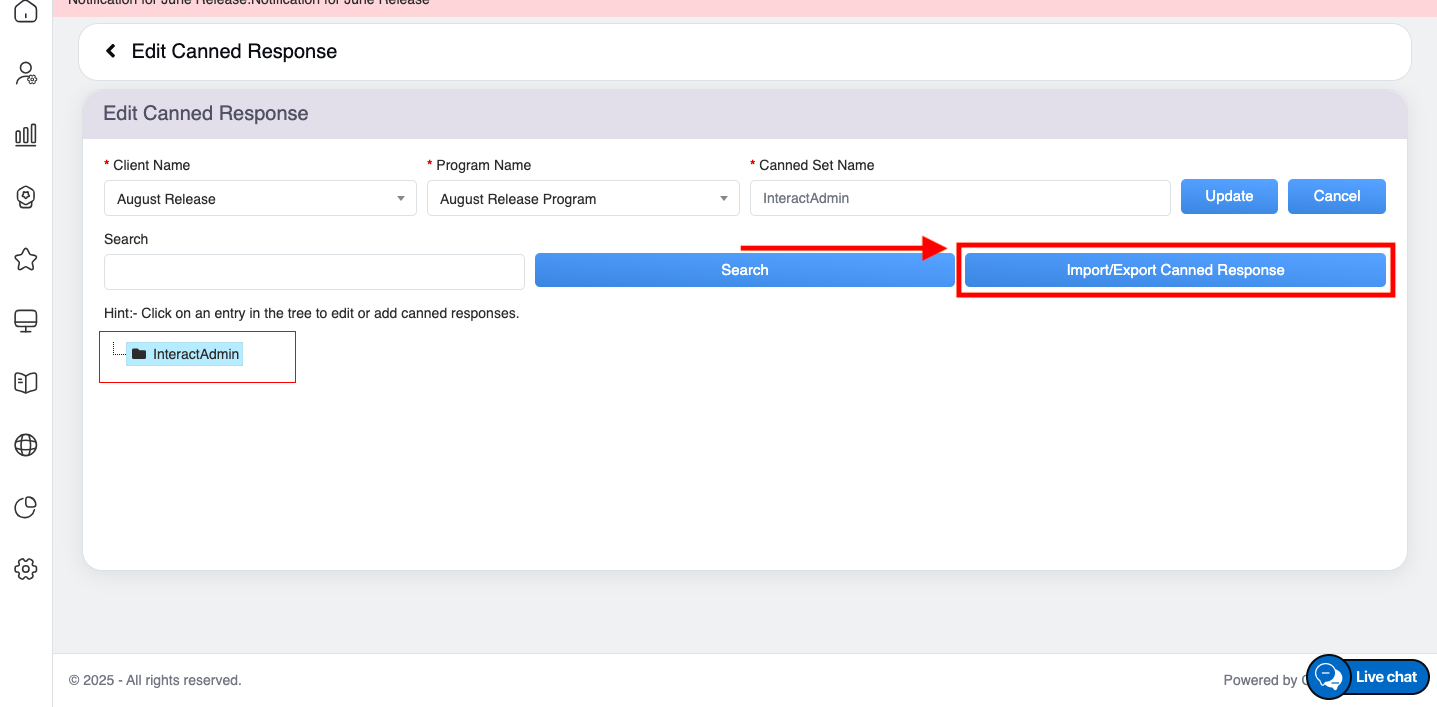
Edit Canned Response Tab
The Import/Export Canned Response window appears as shown below.
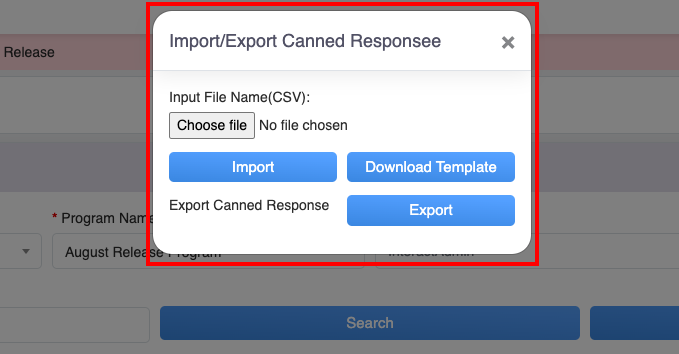
Import/Export Canned Response Tab
2. Click on the Download Template button to download the template. Add the canned response list following the same format of the downloaded template and save it in the desired location in .CSV format only.
3. Then, click on the Choose File button to select the required .CSV file from the saved location.
4. Next, click on the Import button and the file will be imported.
The canned responses and the menus will be displayed on the Manage Canned Response page.
To export the canned responses set, click on the Export button from the Import/Export Canned Response window, then save the file at a suitable location for further use.
Search Canned Response
A Search Canned Response functionality allows the admin to search active or inactive canned responses from the QEval system. The page also provides the option to search canned response sets on the basis of filters such as client and program. The admin also has the scope to edit or delete a canned response from a search result.
Click on the Search Canned Response button.
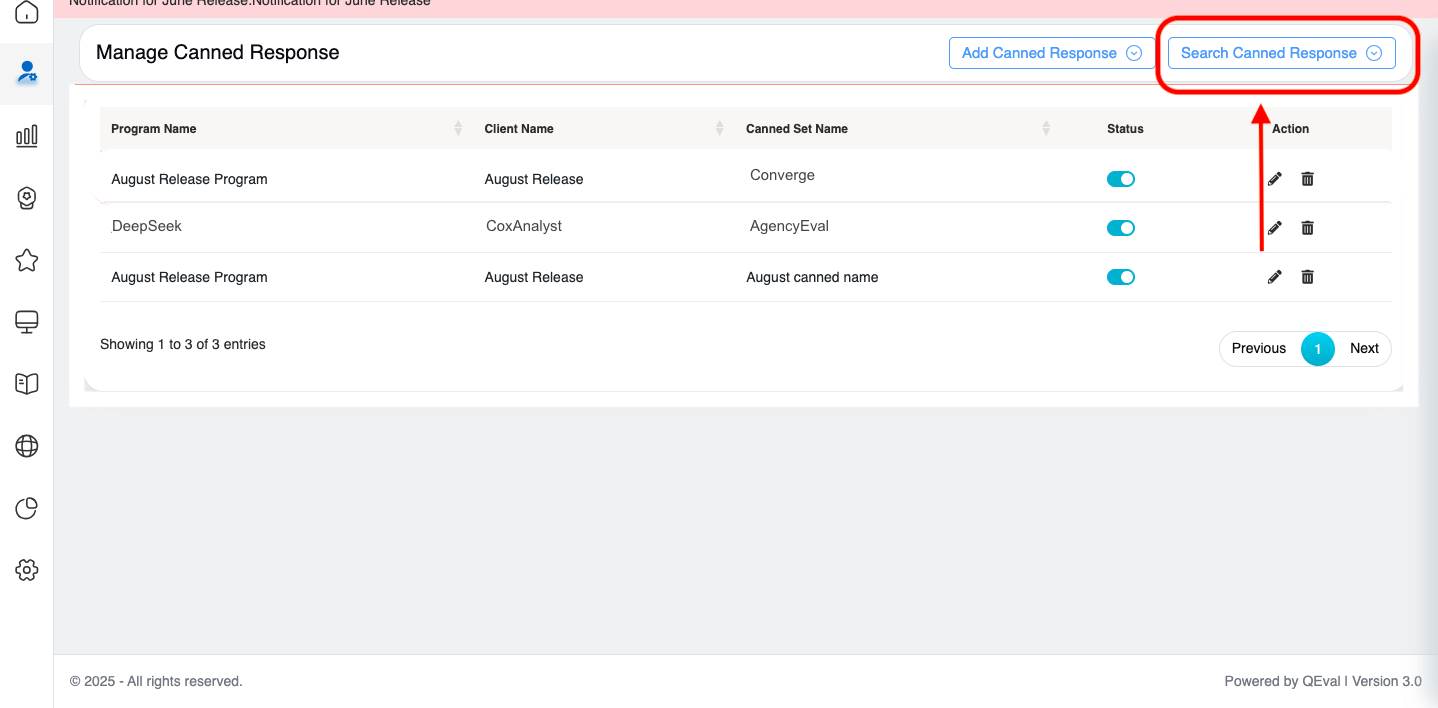
Search Canned Response Button
The following screen appears:
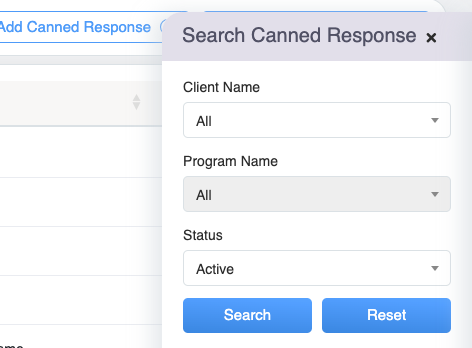
Search Canned Response Tab
The page displays search criteria based on which one can search a particular canned response set. A canned response set can be searched on the basis of selected criteria – Client Name, Program Name, and Status.
Click ![]() button to search the canned response set, or click
button to search the canned response set, or click ![]() button to reset the search filters.
button to reset the search filters.
Based on the applied search filter, all the canned response sets will be visible on the Manage Canned Response page as shown on the screen below.
Manage Canned Response Tab
The following details will be displayed:
- Program Name: Displays the name of the program.
- Client Name: Displays the name of the client.
- Canned Set Name: Displays the name of the canned response set.
- Status: Select the toggle button to enable or disable the specific canned response set.
- Action: Two action icons will be displayed – Edit and Delete.
Edit Canned Response
Click on the Edit ![]() icon displayed under the Action column to edit a particular canned response set and the Edit Canned Response screen will be displayed as shown below:
icon displayed under the Action column to edit a particular canned response set and the Edit Canned Response screen will be displayed as shown below:
Edit Canned Response Tab
The process of editing any canned response set is the same as that of adding a canned response set. So, refer to Add Canned Response section.
Once the information is updated, an acknowledgment message will be displayed.
Delete Canned Response
From the Manage Canned Response, click on the Delete ![]() icon to delete the canned response set and the following confirmatory message as shown below:
icon to delete the canned response set and the following confirmatory message as shown below:
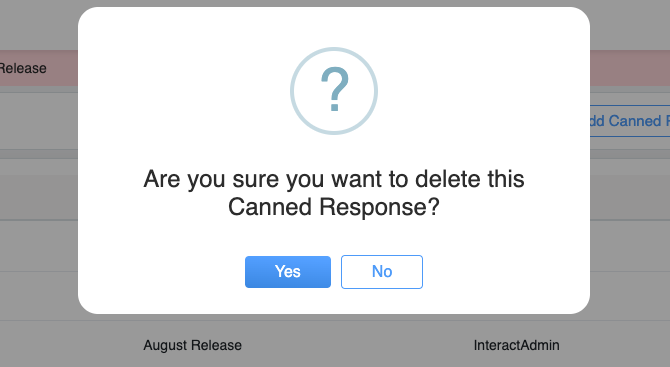
Acknowledgement message
Click ![]() button to continue with the deletion of the canned response or click
button to continue with the deletion of the canned response or click ![]() button to cancel the process.
button to cancel the process.
Video