KPI Index or a Key Performance Indicator tracks an agent’s performance for a given parameter of a program. The performance is analyzed on the basis of the configured benchmark.
To set a KPI, select KPI from the left panel of different menus:
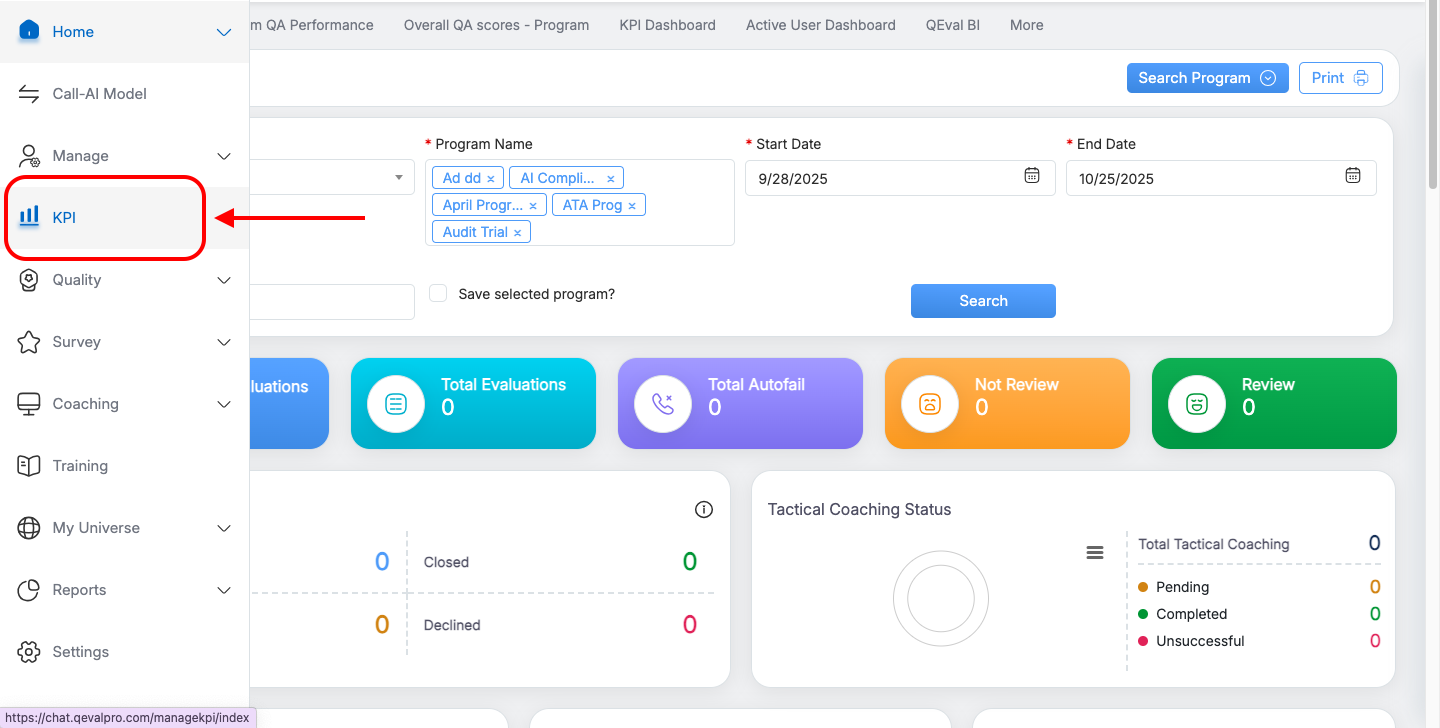
The following screen will be displayed:
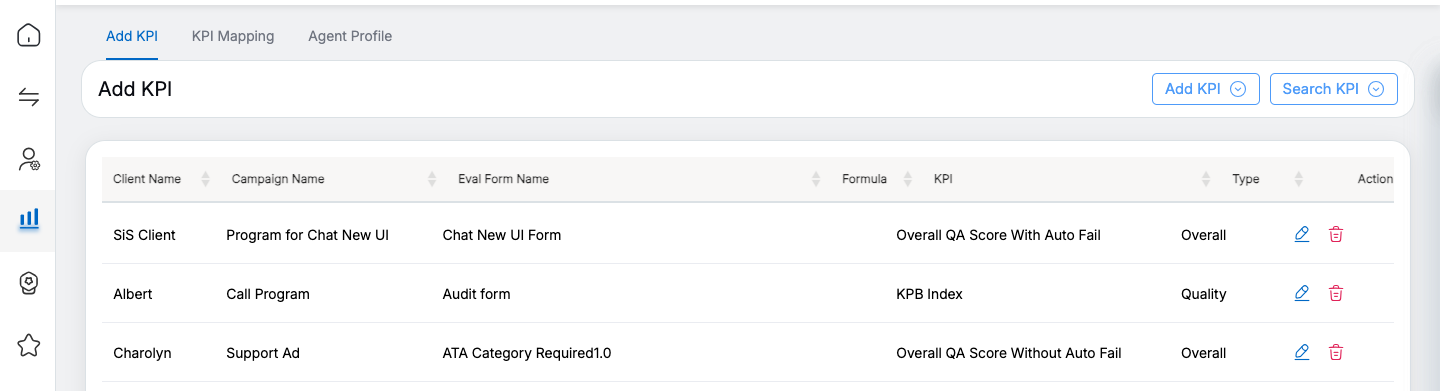
From the KPI Screen, the following functionalities can be availed:
- Add KPI (Explained Below)
- Search KPI
- KPI Mapping
- Agent Profile
Let’s understand each functionality in detail.
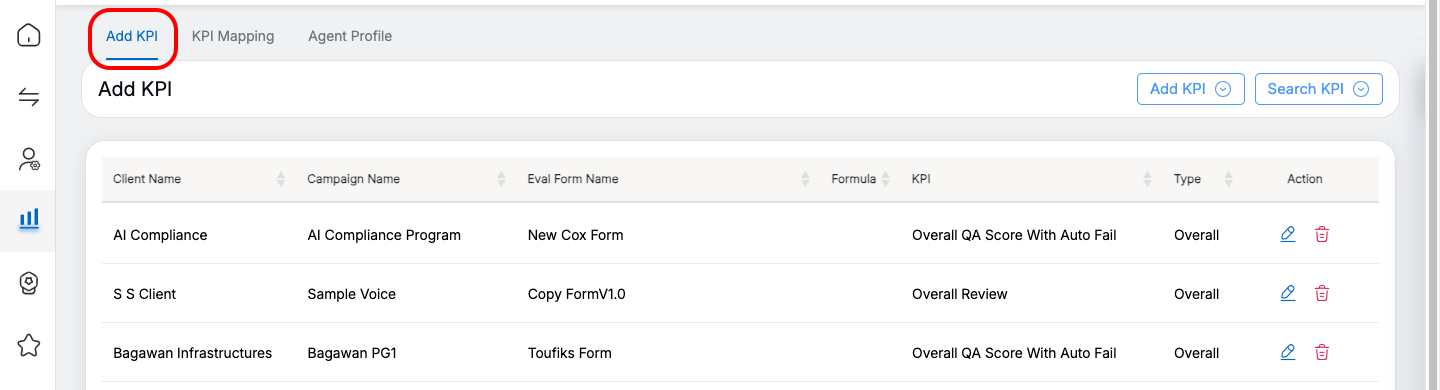
Add KPI
From the Add KPI tab, one can add the KPIs.
To add a new KPI, click on the Add KPI button as shown below:
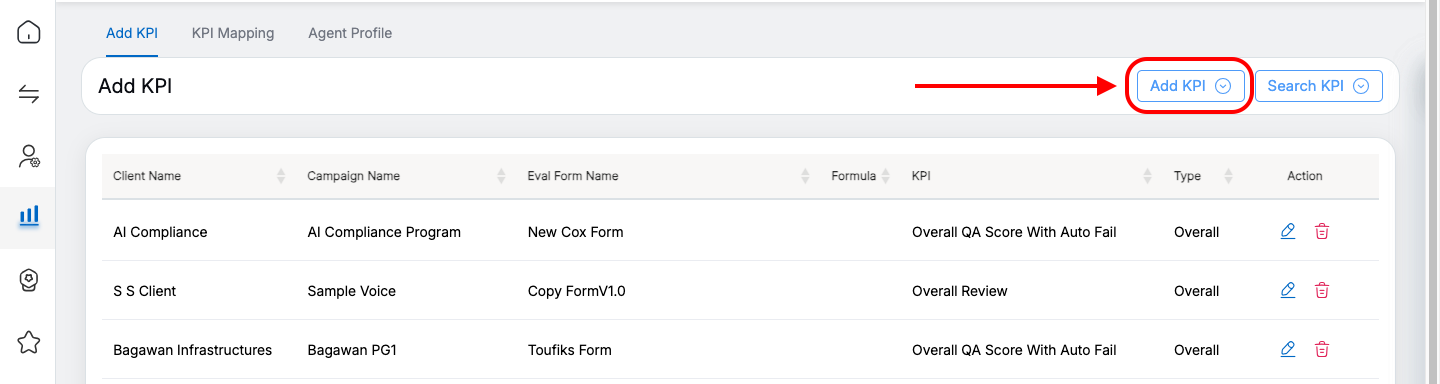
The following screen will be displayed:
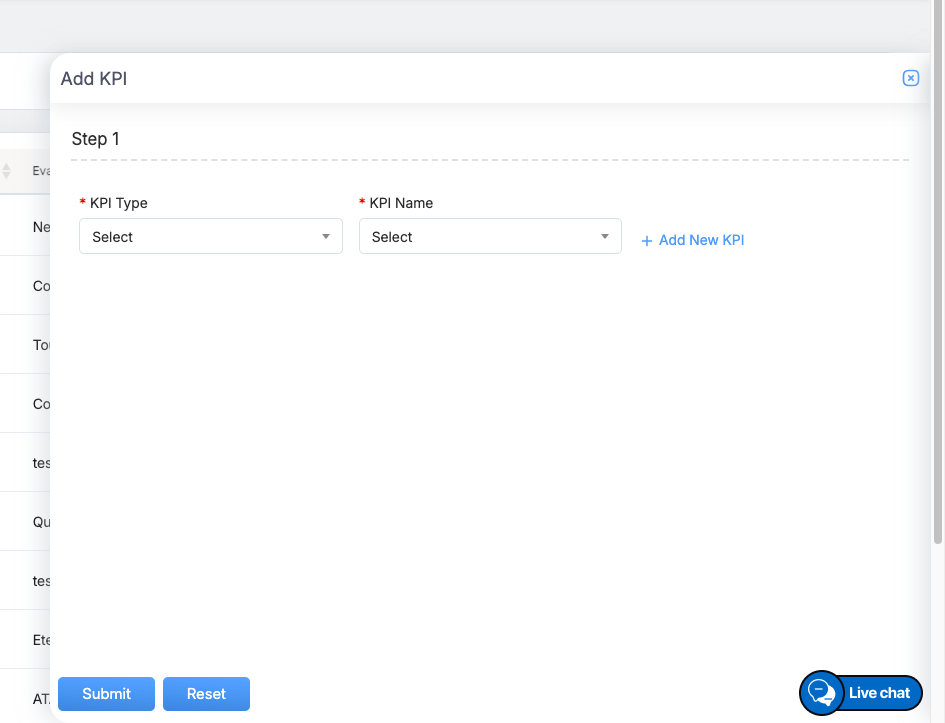
Step 1
Select a required KPI Type from the dropdown list of options – Overall, Performance and Quality. Once the KPI type is selected, the Step 2 and Step 3 fields will be displayed accordingly.
KPI Type: Performance
- If the KPI Type is selected as Overall, along with other configurations, Step 2 and Step 3 will also be displayed as shown on the screen below:
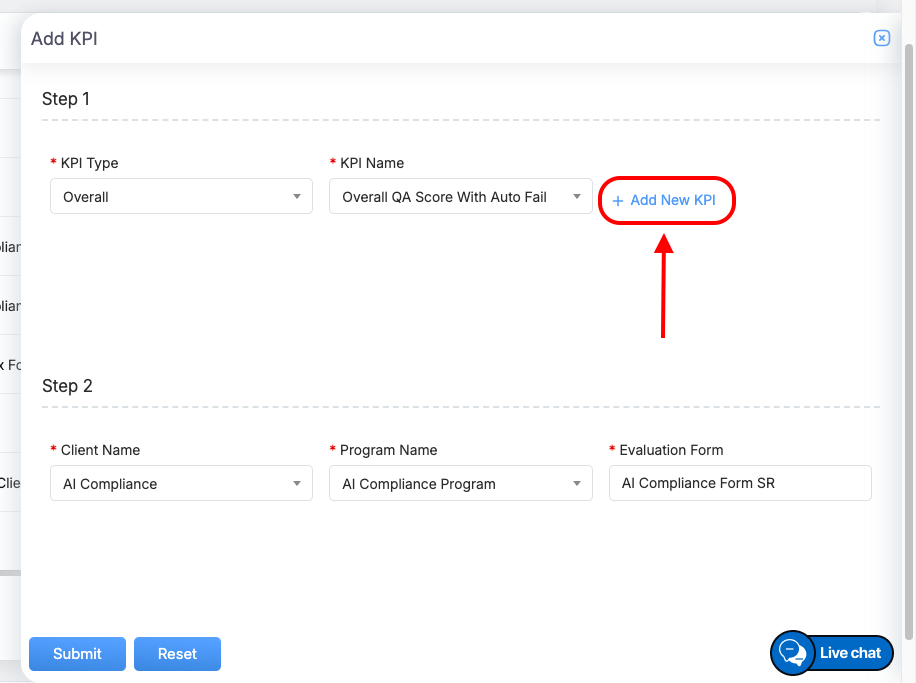
- Select the KPI Name from the dropdown list. To add a new KPI, click on the Add New KPI link.
- The following KPI Name window will be displayed:
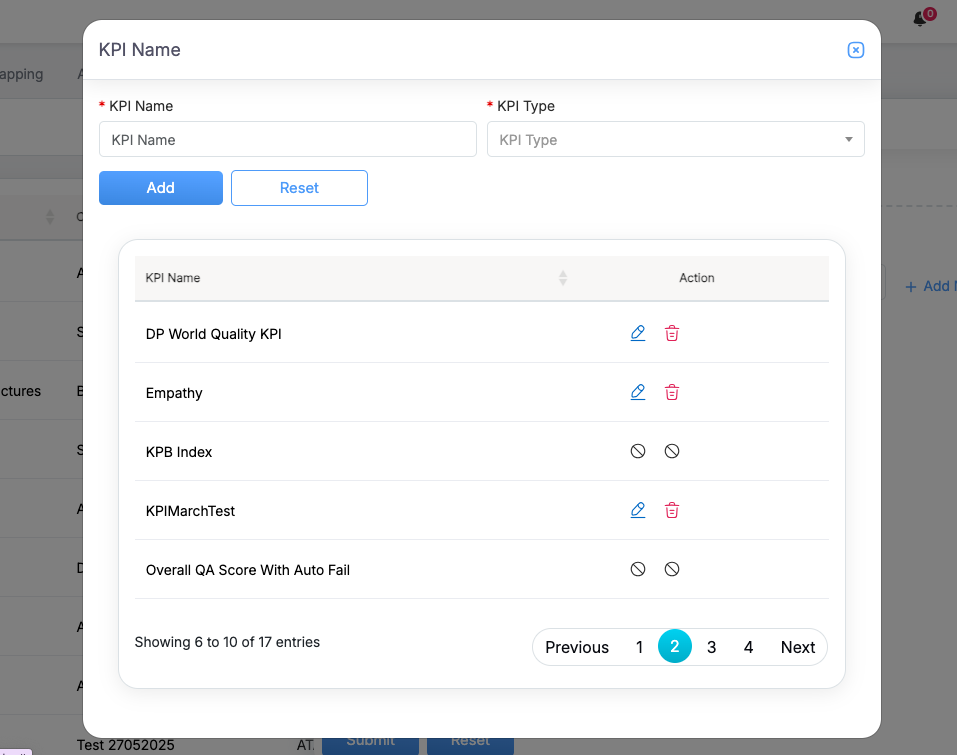
- In this window, one can add a new KPI by providing details like KPI Name and KPI Type. Once configured, click on the Add button. To reset the fields, click on the Reset button.
- In this window, the list of previously added KPIs will be displayed in a grid. One can edit as well as delete these KPIs from this grid. To edit, click on the Edit
 icon displayed under the Action column to edit a particular KPI, and the details of that KPI will be displayed in the same window.
 - To delete a KPI, click on the Delete
 icon and the following confirmatory message will be displayed as shown below:
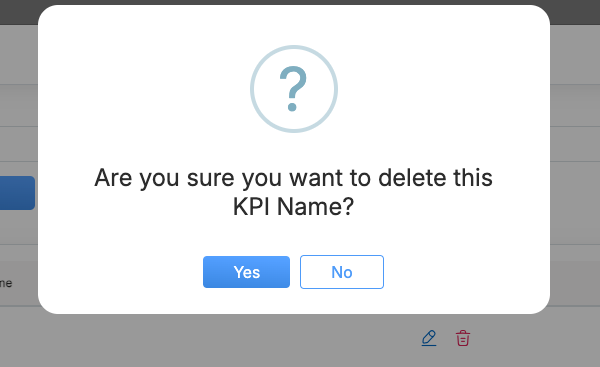
- Click
 button to continue with the deletion of the KPI or click
  button to cancel the process.
 - Once the configuration of the new KPI is concluded, click on the
 icon to close the window.
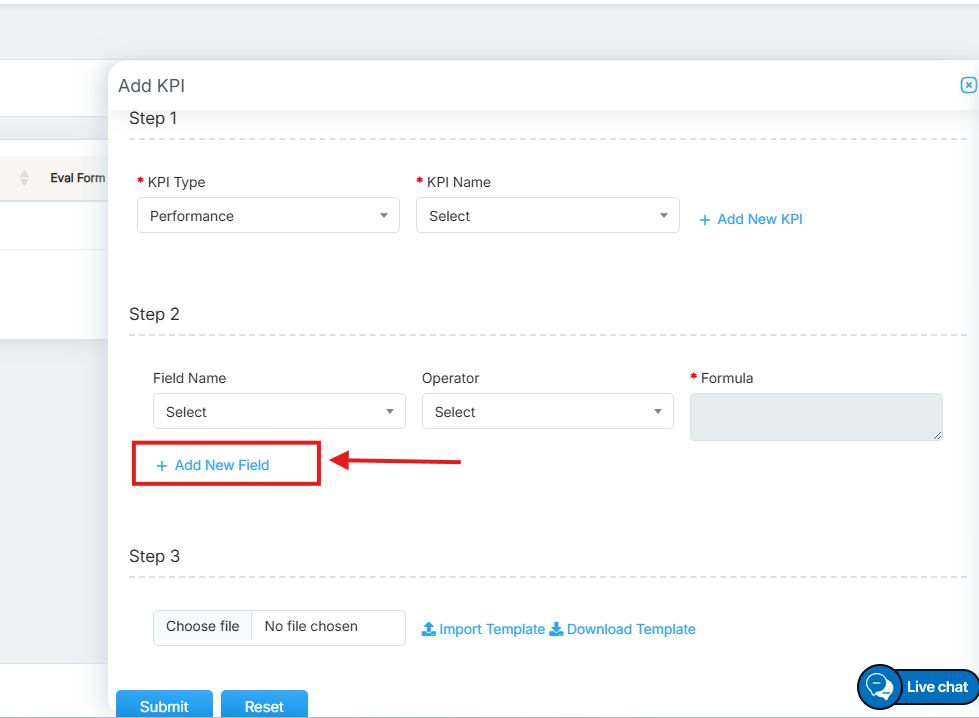
Step 2
- Select the Field Name from the dropdown list which will be used to create a Formula. One can add a new field by clicking on the Add New Field link as shown below:
- The following Field Details window will be displayed:
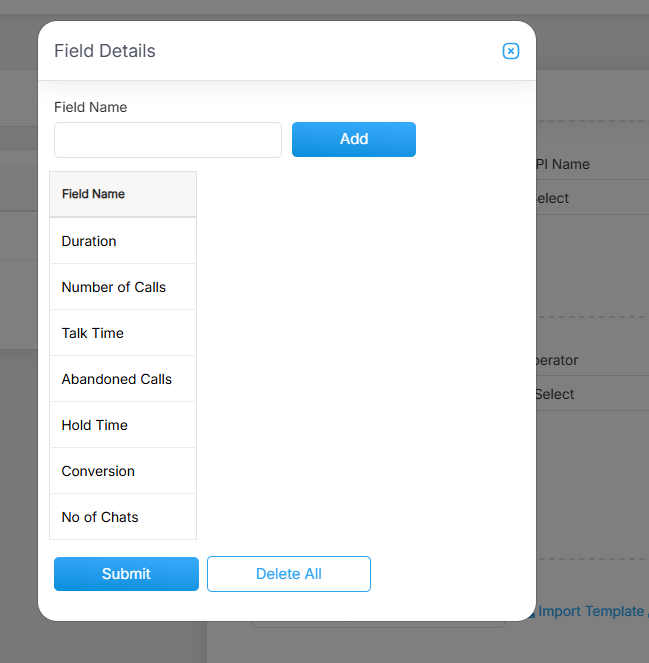
- In this window, one can add a new field by entering the Field Name. Once configured, click on the Add button.
- In this window, the list of previously added fields will be displayed in a grid. One can delete all these fields from this grid at once. To do so, click on the
 and the following confirmatory message will be displayed as shown below:
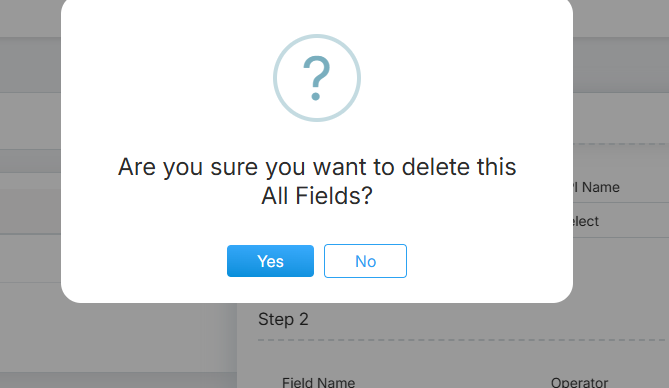
- Click button to continue with the deletion of the field or click button to cancel the process.
- Once the configuration of fields is concluded, click on the icon to close the window.
- The newly created field will be displayed on the Field Name dropdown list.
- Select the mathematical Operator from the dropdown list to create a Formula.
- The Formula field will be in read-only mode and it will display the formula created by the selected Field Name and the selected Operator.
For example, select the Duration as Field Name. Select ‘+’ as the Operator. Then again select No of calls as Field Name.
Now the Formula field will display the new formula created: Duration + No of calls.
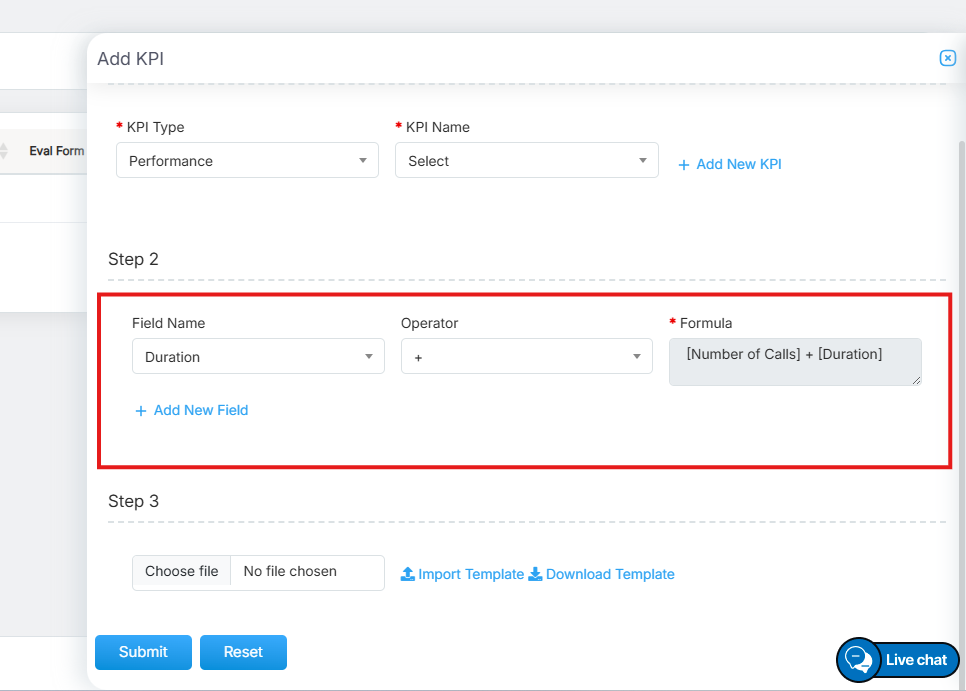
- Similarly, one can create the formulas using more than two fields.
Step 3
In this step, one can upload the KPI-related files in a defined format.
- A defined format must be uploaded for the users to follow that format and upload their KPI-related files in the same format. To do so, click on Choose File button to upload the particular KPI Template.
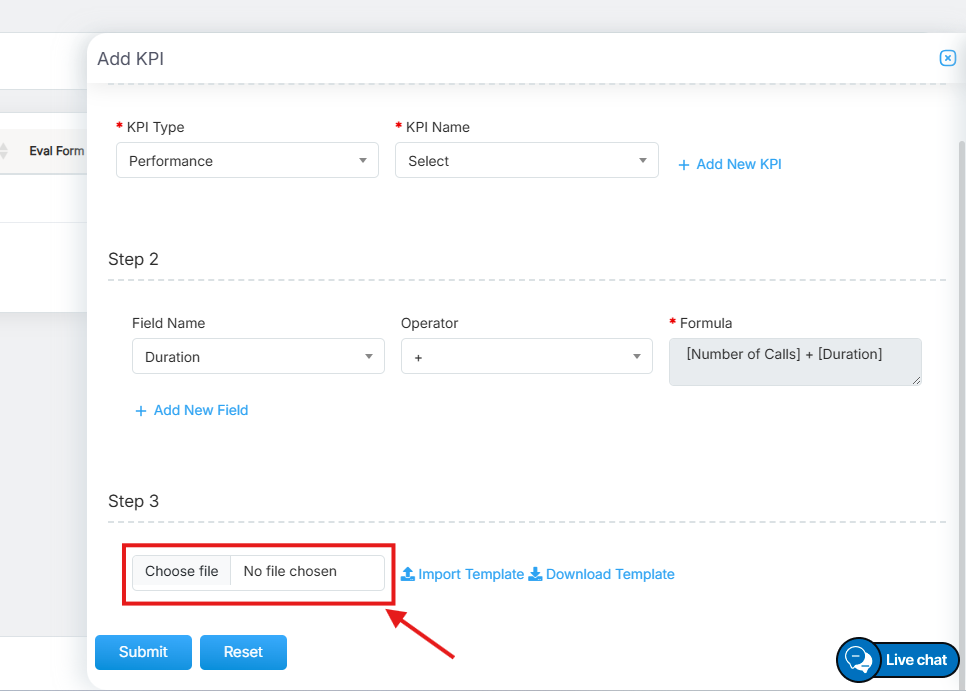
- The uploaded file name will be displayed as shown below:

- Then, import the uploaded KPI Template by clicking on the Import Template.
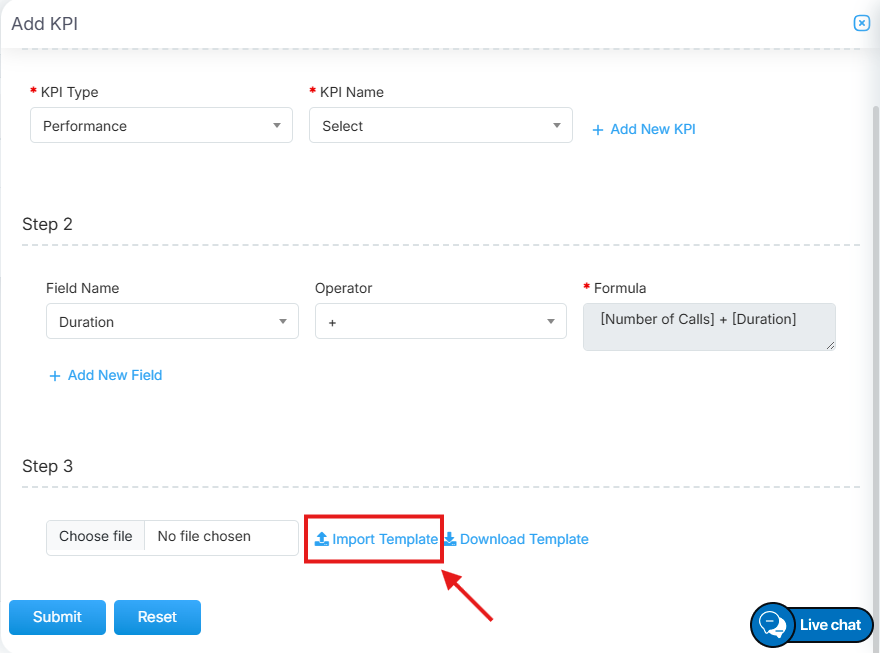
- The file will be imported and saved as the template in the system.
- Now, to download the KPI Template, click on Download Template as shown below:
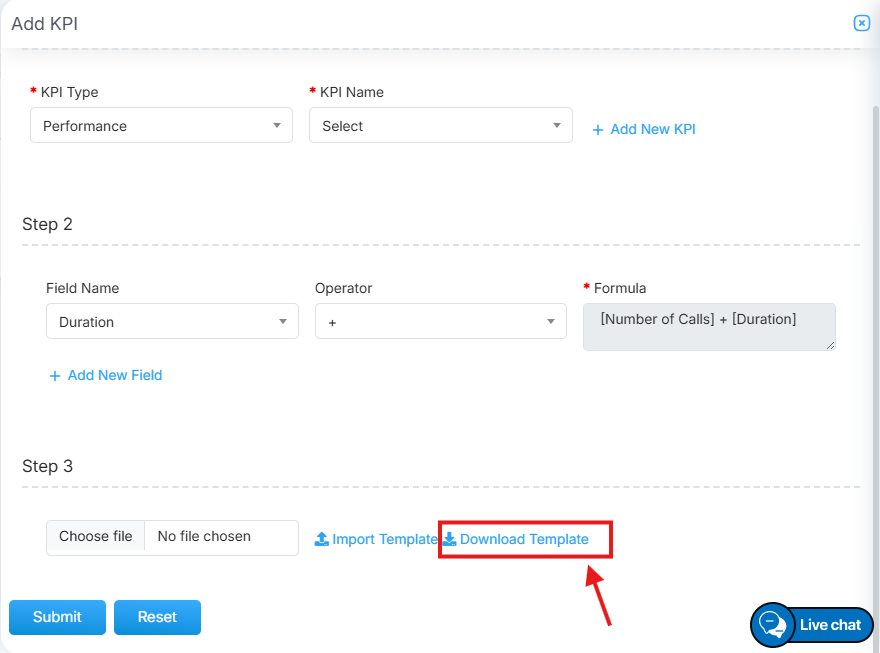
- The template will be downloaded to the local system. Then, the users can provide all the details in the same format as mentioned in the downloaded template.
- Once all the configurations for the new KPI are concluded, click on Submit button. To reset all the fields, click on the Reset button.
KPI Type: Overall
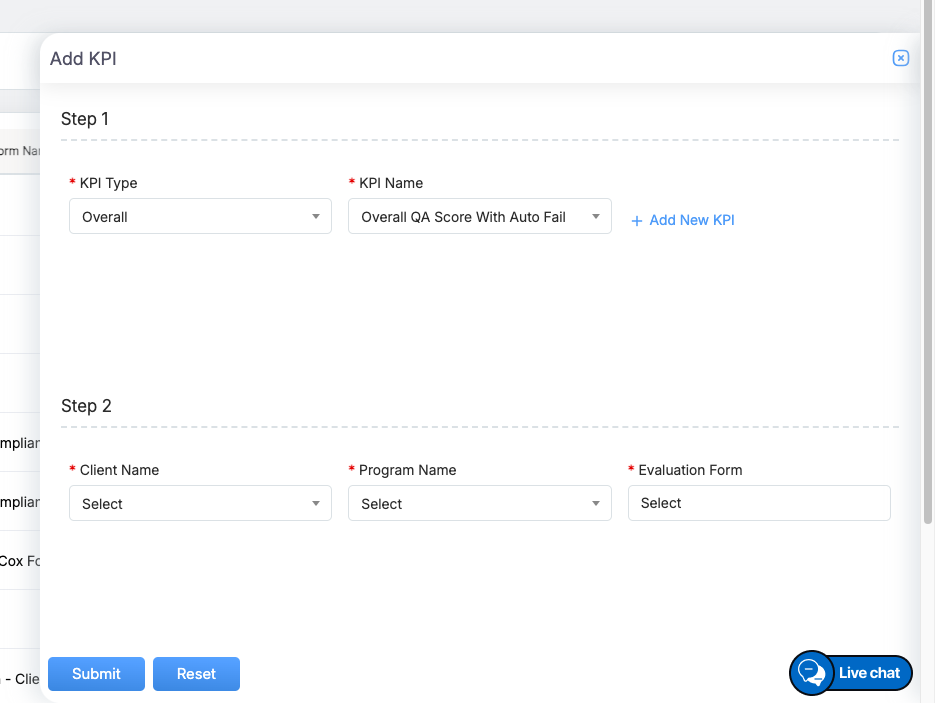
- From the Step 1 section, if the KPI Type is selected as Overall, along with other configurations, Step 2 will also be displayed as shown on the screen below:
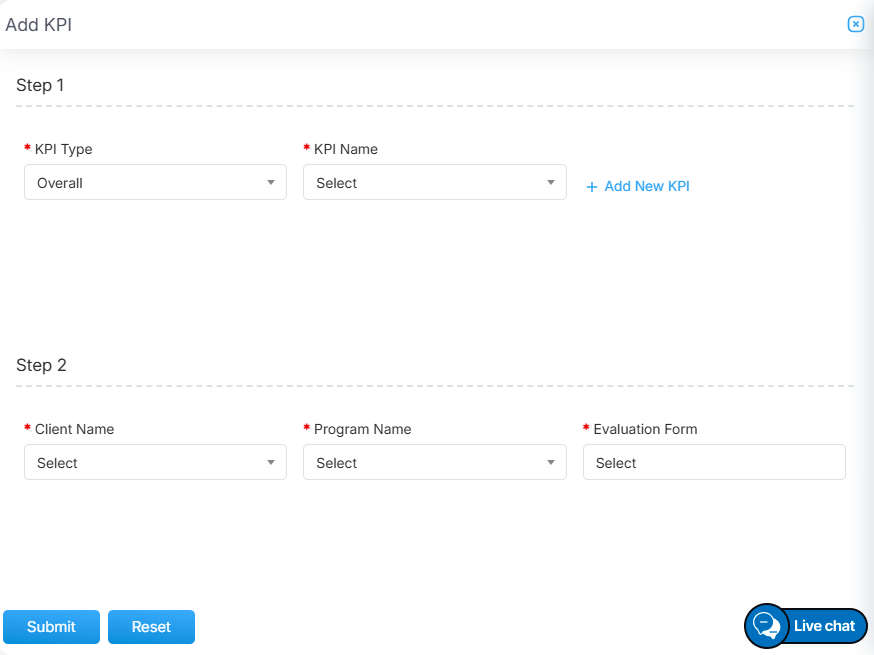
- Select the KPI Name from the dropdown list. To add a new KPI, click on the Add New KPI link. Steps to add a new KPI has been mentioned under the KPI Type: Performance section.
Step 2
- Select the Client Name from the dropdown list.
- Select the Program Name from the dropdown list which will be displayed based on the selection of the Client Name.
- Select the Evaluation Form name from the dropdown list which will be displayed based on the selection of the Program Name.

- Once all the configurations for the new KPI are concluded, click on Submit button. To reset all the fields, click on the Reset button.
KPI Type: Quality
- From the Step 1 section, if the KPI Type is selected as Quality, along with other configurations, Step 2 and Step 3 will also be displayed as shown on the screen below:
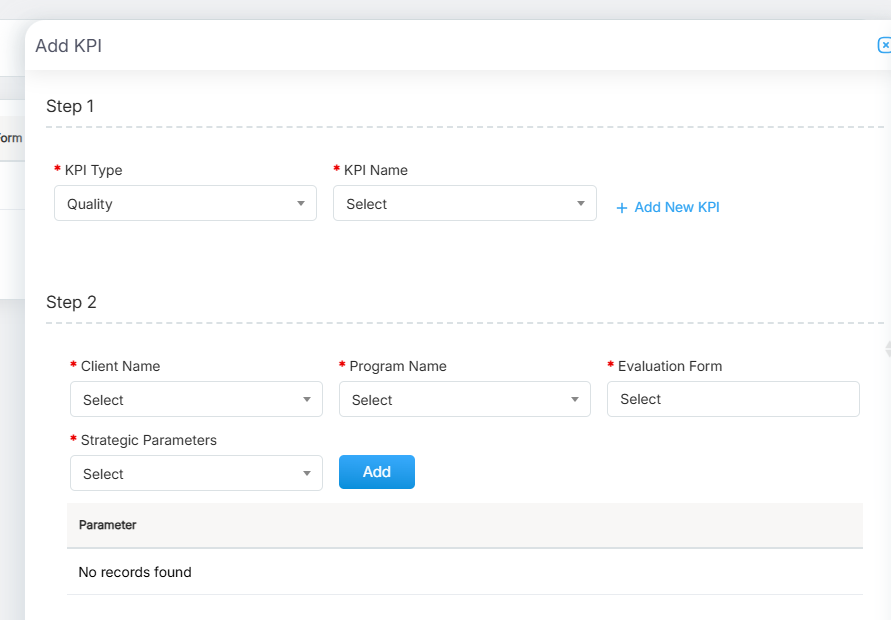
- Select the KPI Name from the dropdown list. To add a new KPI, click on the Add New KPI link. Steps to add a new KPI has been mentioned under the KPI Type: Performance section.
Step 2
- Select the Client Name from the dropdown list.
- Select the Program Name from the dropdown list which will be displayed based on the selection of the Client Name.
- Select the Evaluation Form name from the dropdown list which will be displayed based on the selection of the Program Name.
- Select the Strategic Parameters from the dropdown list which will be displayed based on the selection of the Evaluation Form.
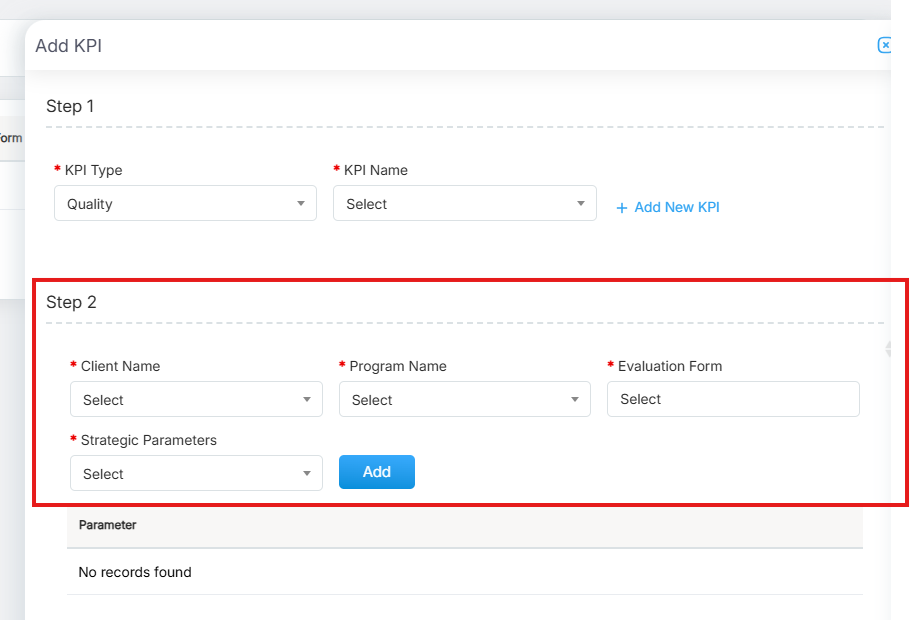
- Once one parameter of the form is selected from the Strategic Parameters field, click on the Add button.
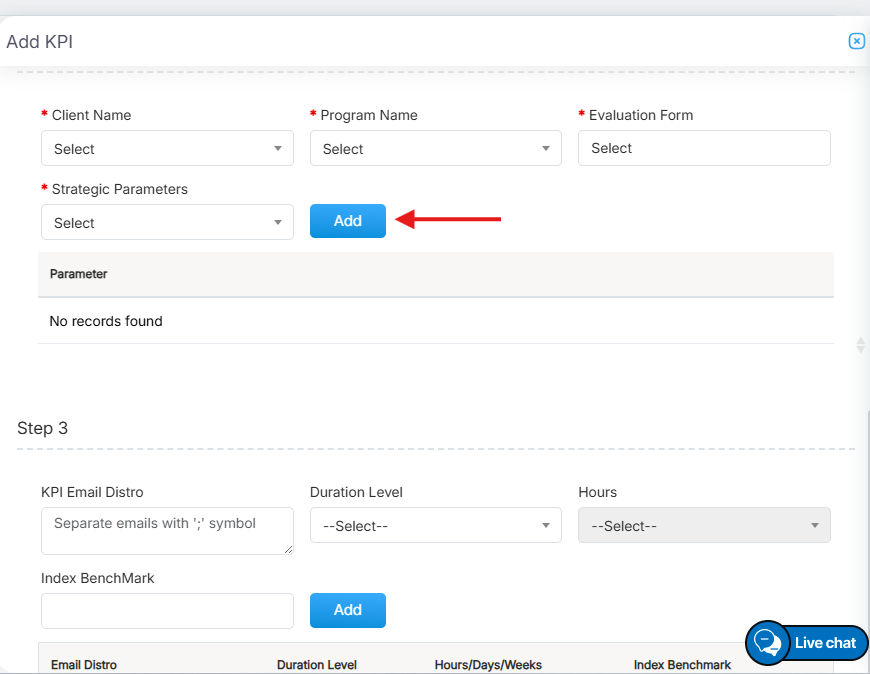
- The selected parameter will be displayed below under the Parameter table as displayed below:
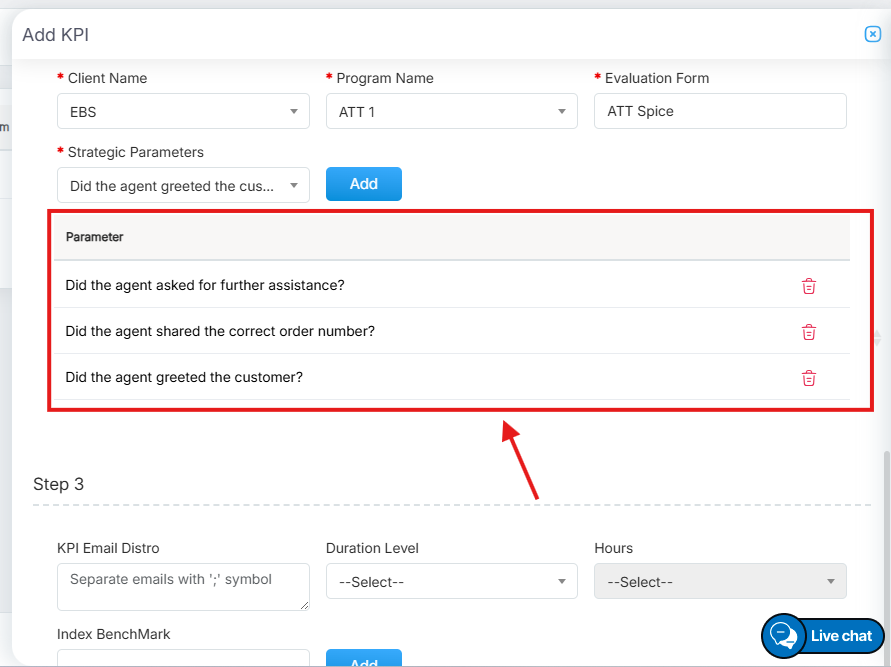
- Similarly, multiple parameters can be added from the Strategic Parameters field. Multiple parameters will be displayed on the Parameter table as shown below:
- The parameters can be deleted by clicking on the Delete icon.
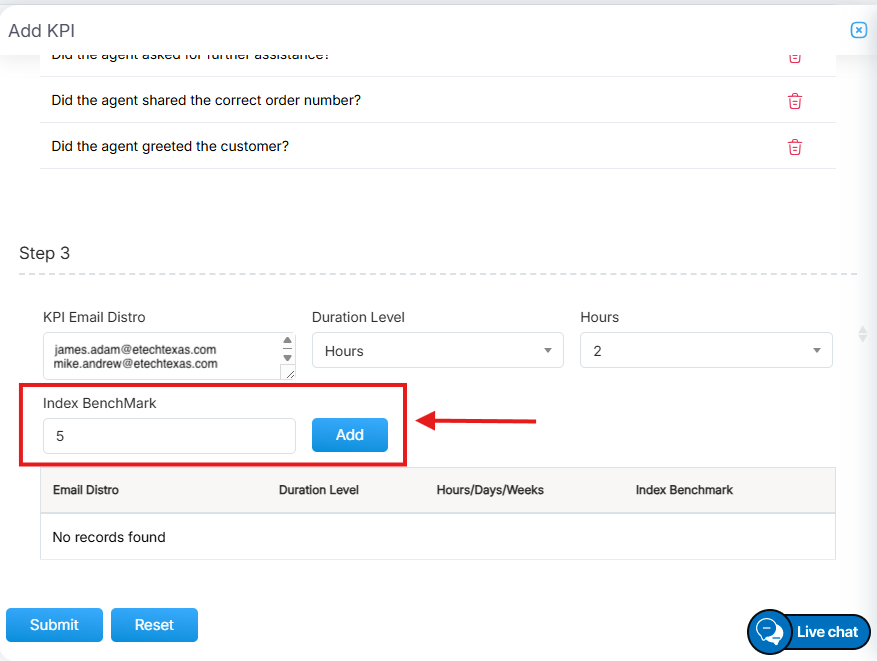
Step 3
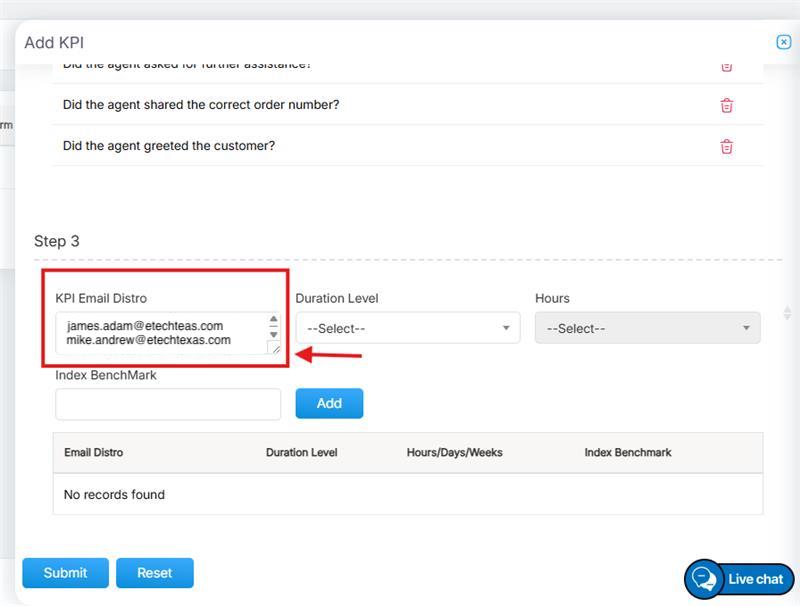
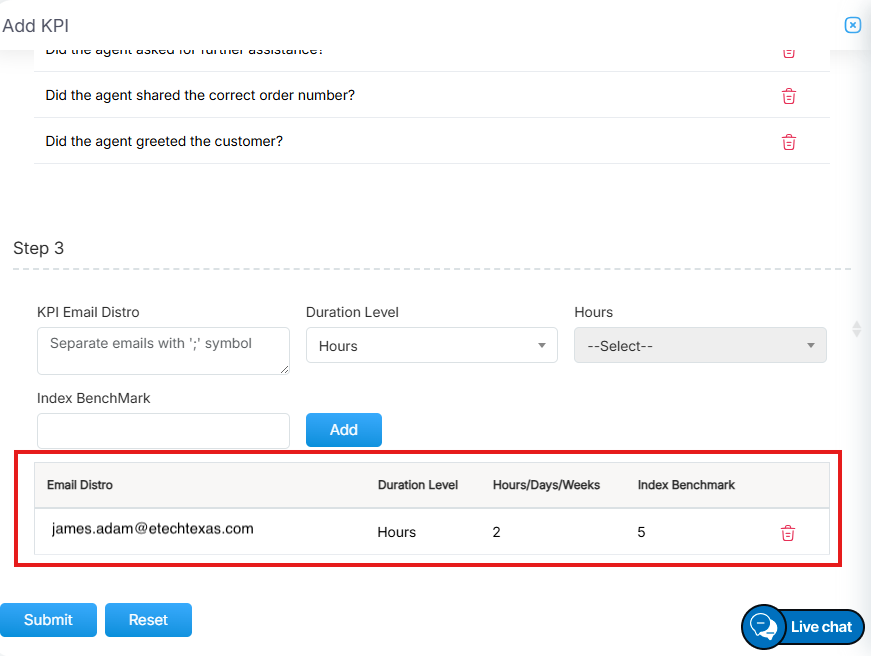
- Enter the Email ID(s) of the recipients in the distro field. The system will trigger the mail to the configured distro list as and when required.
Note: Enter multiple Email IDs with commas separated as shown below.
- Select the Duration Level from the dropdown list – Hours, Days, and Weeks. The system will trigger the mail to the distro list in the interval of the selected duration.
- Based on the selection of the Duration Level, a new dropdown field will be displayed from where the duration can be selected. If the Duration Level is selected as Hours, then the Hours field will be displayed, from where the number of hours can be selected from the dropdown field.
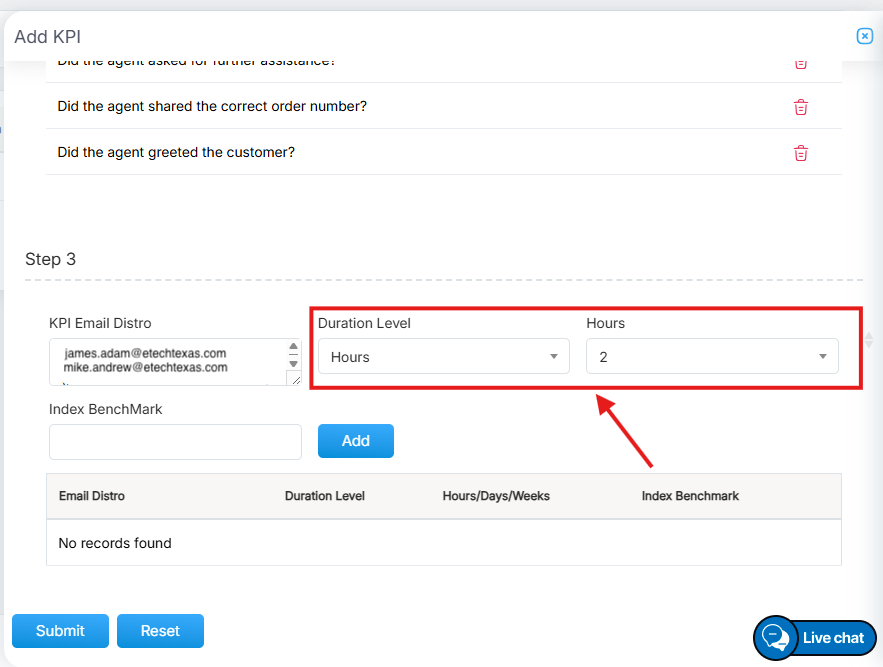
- Similarly, if Days or Weeks are selected from the Duration Level, the Days or Weeks field will be displayed from where the number of days or weeks can be selected from the dropdown field respectively.
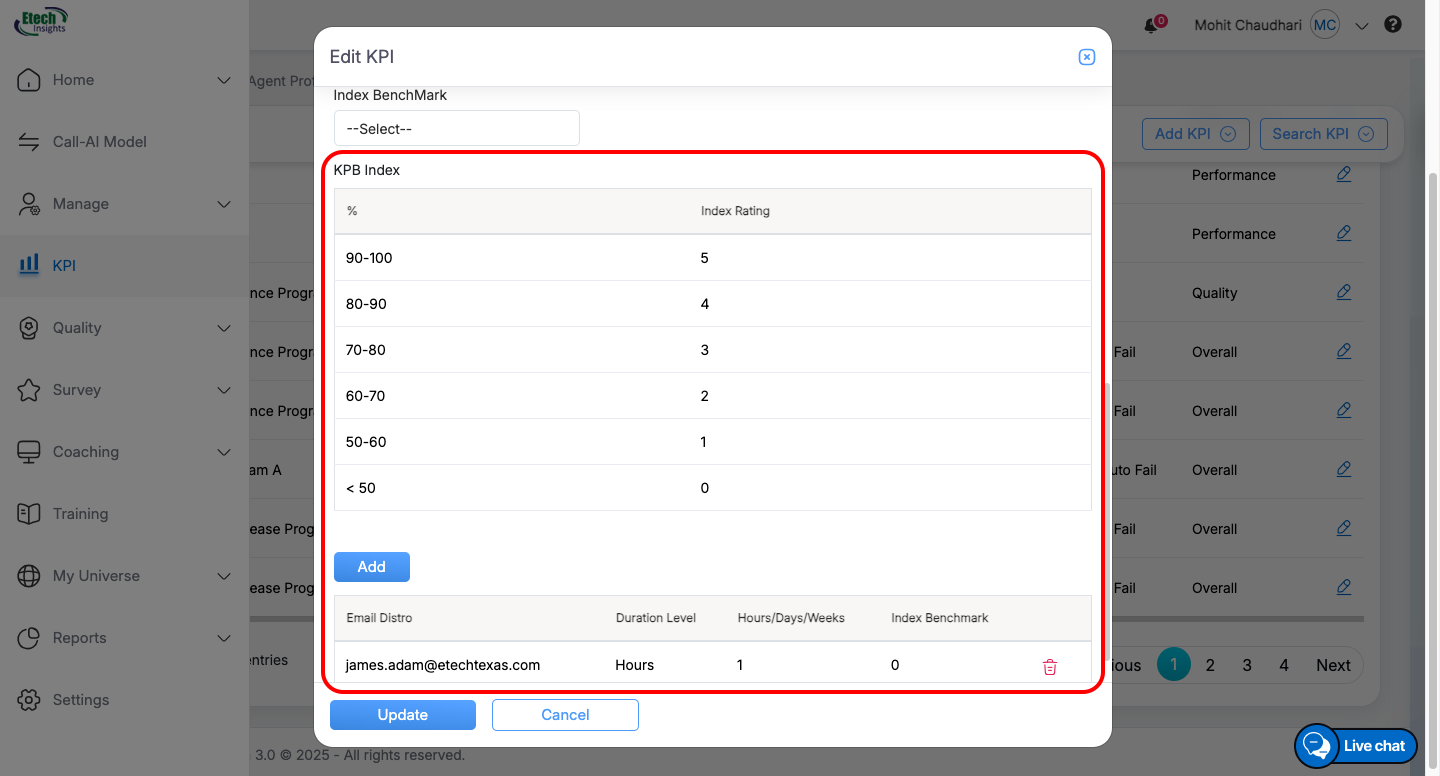
- Select the Index Benchmark from the dropdown field. If the score obtained is below the set benchmark then the system will trigger the mail to the configured distro list.
- A user can refer to the mentioned index rating against the percentage to select the same for the Index Benchmark field.
- Once the configuration of fields in Step 3 is concluded, click on the Add button. All the configured information in this step will be displayed in the grid displayed below:
Note: Make sure each email distro is assigned a unique Index Benchmark.
- Once all the configurations for the new KPI are concluded, click on Submit button. To reset all the fields, click on the Reset button.
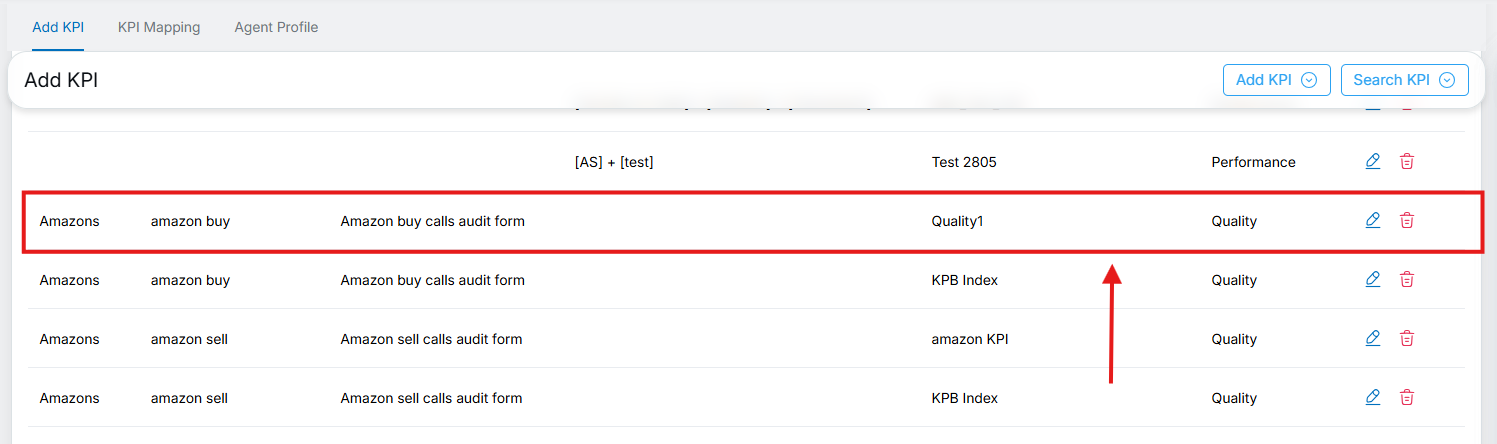
The submitted KPB Index for a KPI type displays in the grid on the Add KPI page.
Video